> ## Documentation Index
> Fetch the complete documentation index at: https://guide.upcharq.com/llms.txt
> Use this file to discover all available pages before exploring further.
# Doctor Quick Start
> Get started as a doctor on UpcharQ in minutes.
## Welcome to UpcharQ!
Your doctor profile has already been created by the UpcharQ Team. To start using the platform, you only need to **activate your account** by completing a few simple verification steps.
**Estimated Setup Time:** 2–3 minutes
## Before You Begin
Before starting the activation process, ensure you have access to:
* Your registered **Mobile Number**
* Your registered **Email Address**
* The **activation link** provided by UpcharQ
Your professional information, hospital association, and account details have already been configured by the UpcharQ Super Admin.
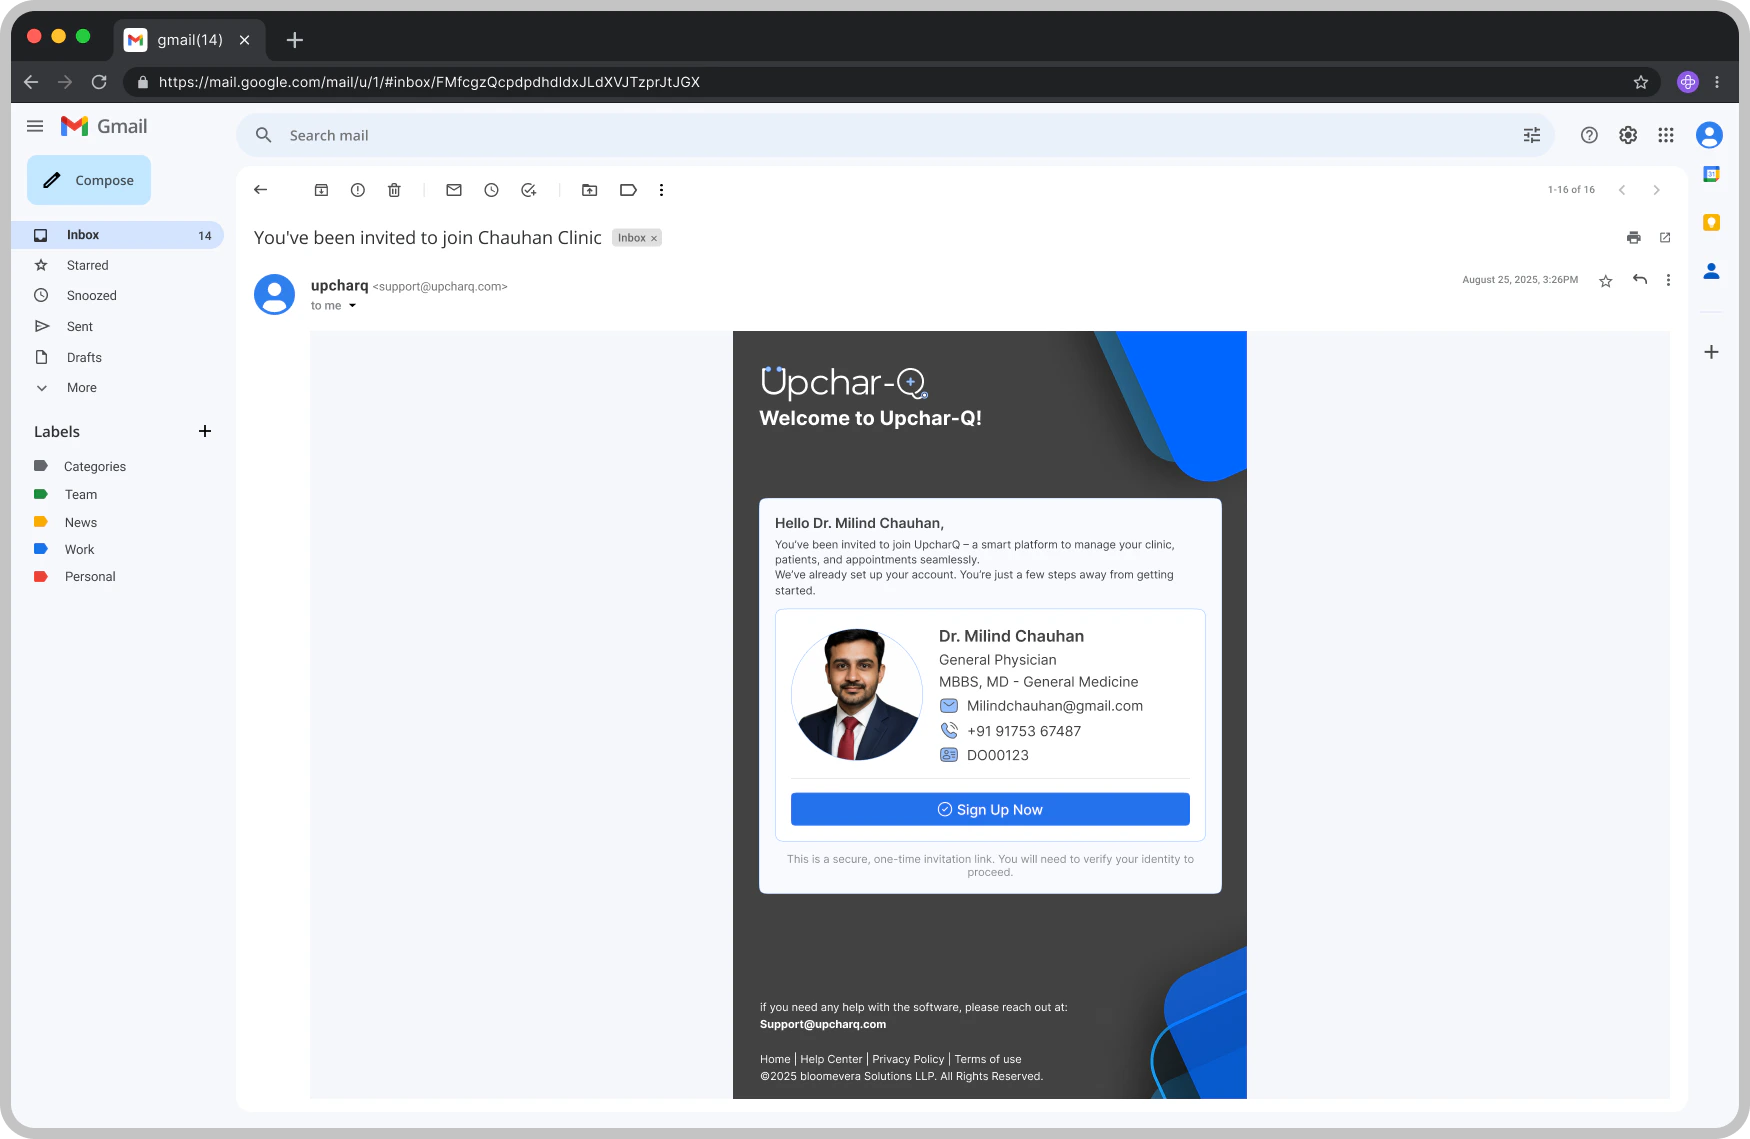
## Step 1: Open Your Activation Link
Click the activation link shared with you by Upchar-Q.
The activation screen will display your registered details, including:
* Doctor Name
* Registered Mobile Number
* Registered Email Address
* Associated Hospital or Clinic
Review the information and click **Sign Up Now**. You will redirect to app.upcharq.com/doc/signup
 ## Step 2: Verify Your Mobile Number and Email Address
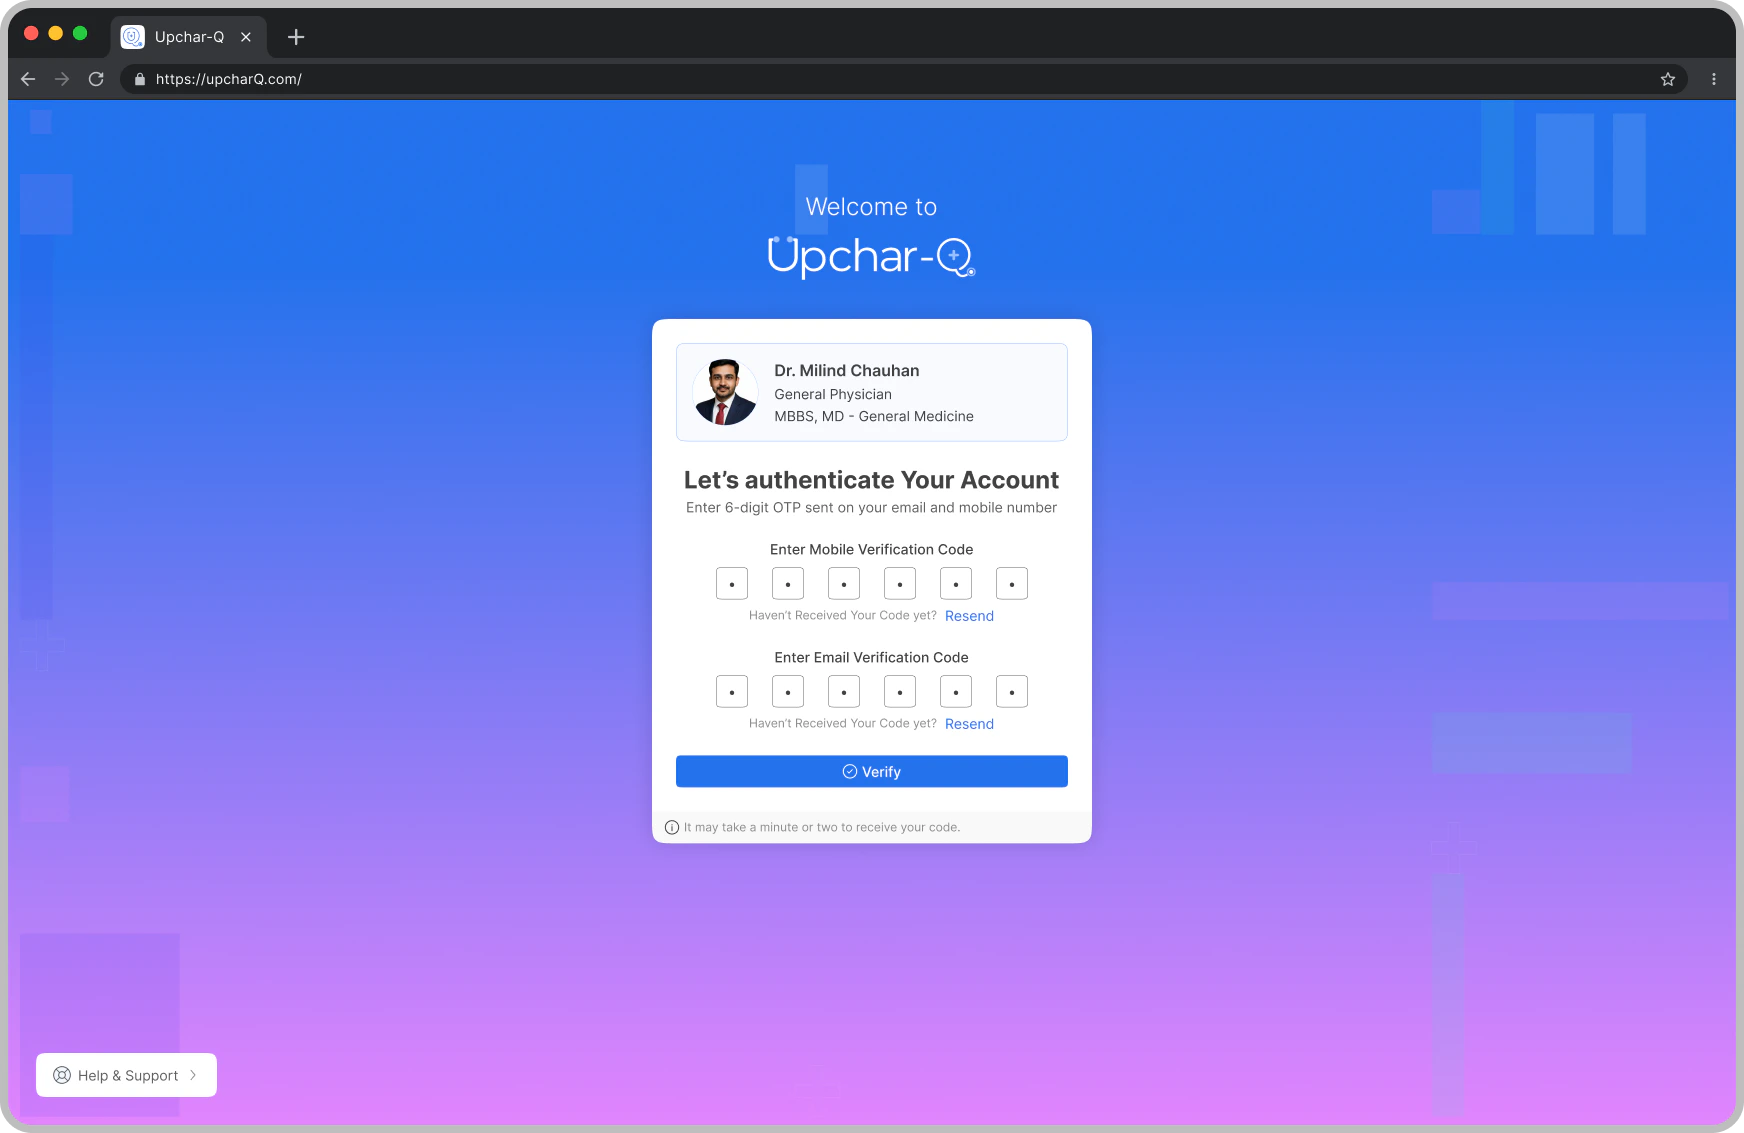
As soon as you open the activation link, Upchar-Q **automatically sends an OTP to both** your registered mobile number and email address. You don't need to click anything to trigger them — just enter the codes when they arrive.
Enter the OTP received on your registered mobile number.
Enter the OTP received in your registered email inbox.
Click **Verify** to confirm both your mobile and email at once.
Once verified, a success indicator will appear for both mobile and email.
* Verify that your mobile network is active and check your email spam/junk folder.
* Wait a few moments and try again.
* Use the **Resend OTP** option to request a new code.
## Step 2: Verify Your Mobile Number and Email Address
As soon as you open the activation link, Upchar-Q **automatically sends an OTP to both** your registered mobile number and email address. You don't need to click anything to trigger them — just enter the codes when they arrive.
Enter the OTP received on your registered mobile number.
Enter the OTP received in your registered email inbox.
Click **Verify** to confirm both your mobile and email at once.
Once verified, a success indicator will appear for both mobile and email.
* Verify that your mobile network is active and check your email spam/junk folder.
* Wait a few moments and try again.
* Use the **Resend OTP** option to request a new code.
 ## Step 3: Create Your Password
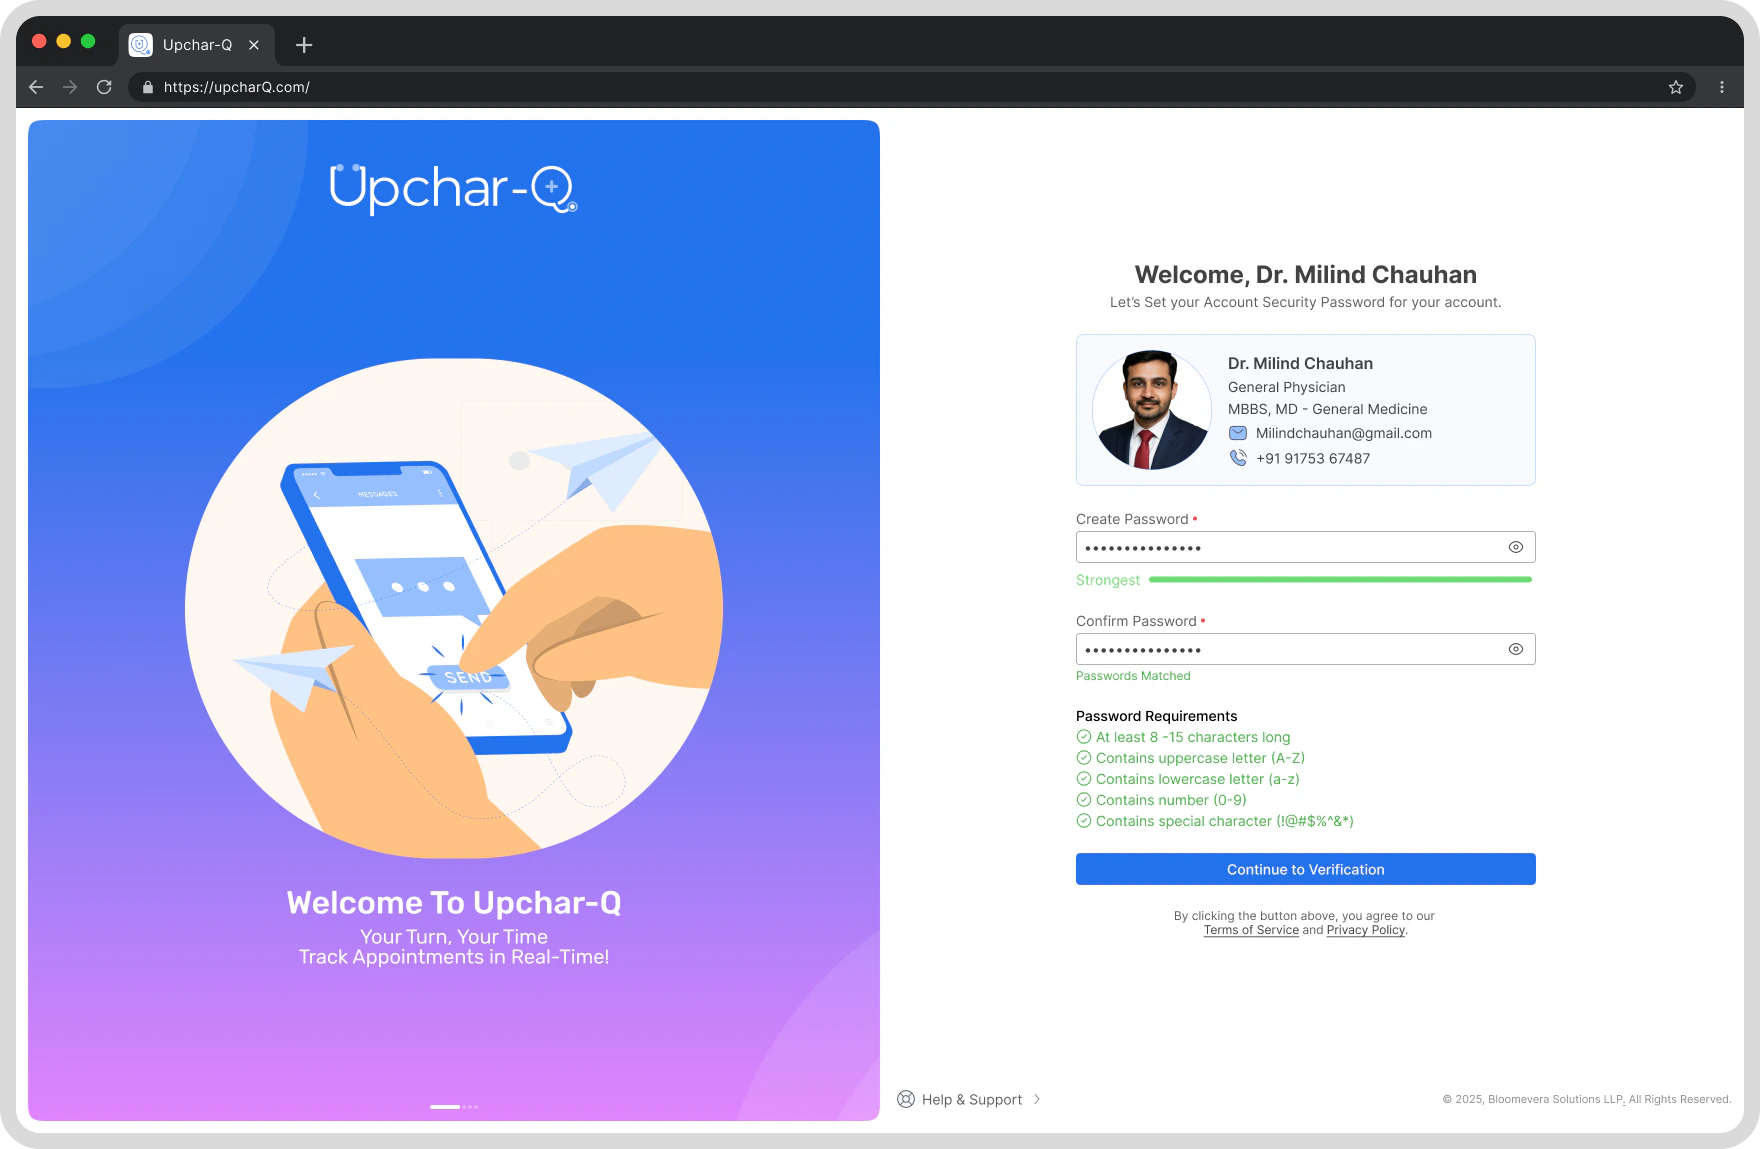
After both contact methods are verified, create your Upchar-Q account password.
### Password Requirements
Your password should:
* Contain at least **8 characters**
* Include **uppercase** and **lowercase** letters
* Include at least one **number**
* Include at least one **special character**
### Setup Process
1. Enter your new password.
2. Re-enter the password for confirmation.
3. Click **Continue**.
Your account credentials are now securely configured.
## Step 3: Create Your Password
After both contact methods are verified, create your Upchar-Q account password.
### Password Requirements
Your password should:
* Contain at least **8 characters**
* Include **uppercase** and **lowercase** letters
* Include at least one **number**
* Include at least one **special character**
### Setup Process
1. Enter your new password.
2. Re-enter the password for confirmation.
3. Click **Continue**.
Your account credentials are now securely configured.
 ## Step 4: Complete Subscription Payment (If Applicable)
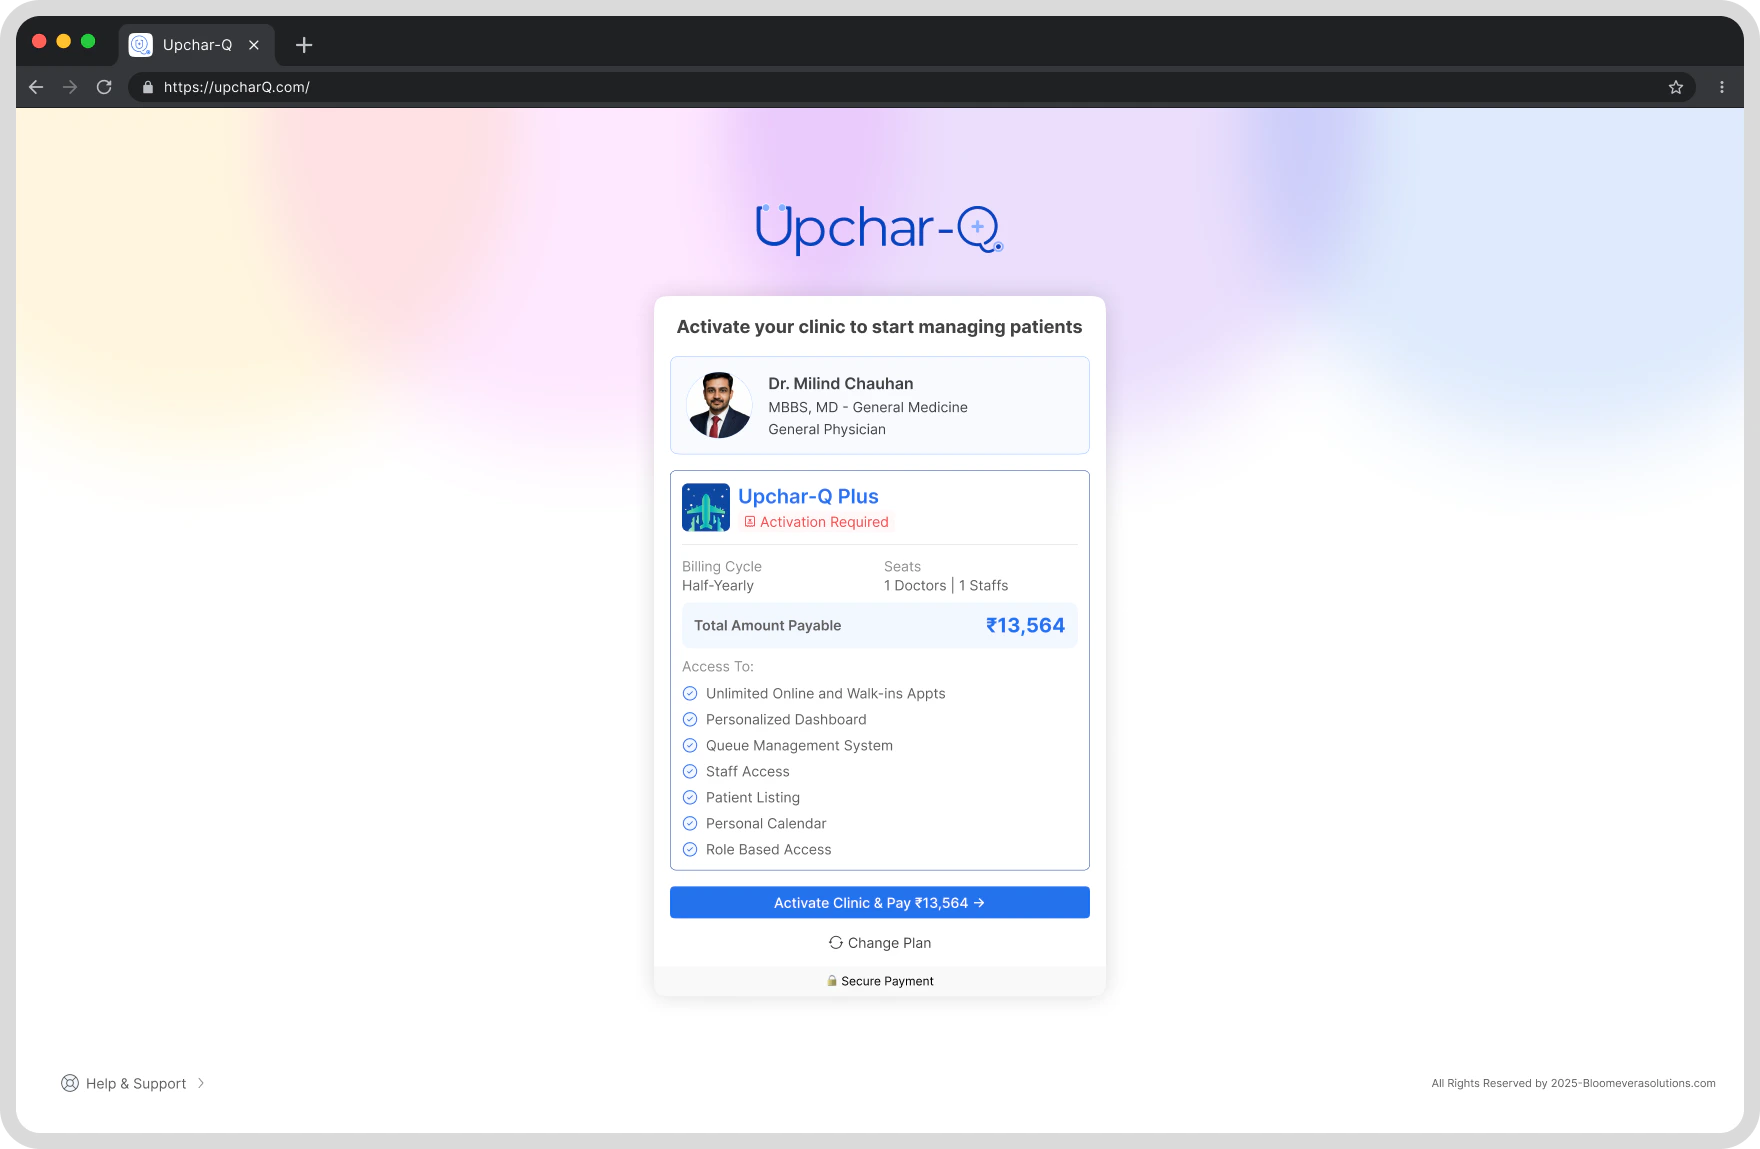
Depending on your subscription plan, payment may be required before accessing the platform.
If your account is assigned to a paid plan:
1. Click **Proceed to Payment**.
2. You will be redirected to the secure **PhonePe Payment Gateway**.
3. Complete the payment using your preferred payment method.
Supported payment methods may include:
## Step 4: Complete Subscription Payment (If Applicable)
Depending on your subscription plan, payment may be required before accessing the platform.
If your account is assigned to a paid plan:
1. Click **Proceed to Payment**.
2. You will be redirected to the secure **PhonePe Payment Gateway**.
3. Complete the payment using your preferred payment method.
Supported payment methods may include:
 ## Step 5: Payment Confirmation
After successful payment:
* Your subscription will be activated automatically.
* Payment status will be updated in real time.
* Your UpcharQ account will be enabled immediately.
No additional activation steps are required.
## Step 5: Payment Confirmation
After successful payment:
* Your subscription will be activated automatically.
* Payment status will be updated in real time.
* Your UpcharQ account will be enabled immediately.
No additional activation steps are required.
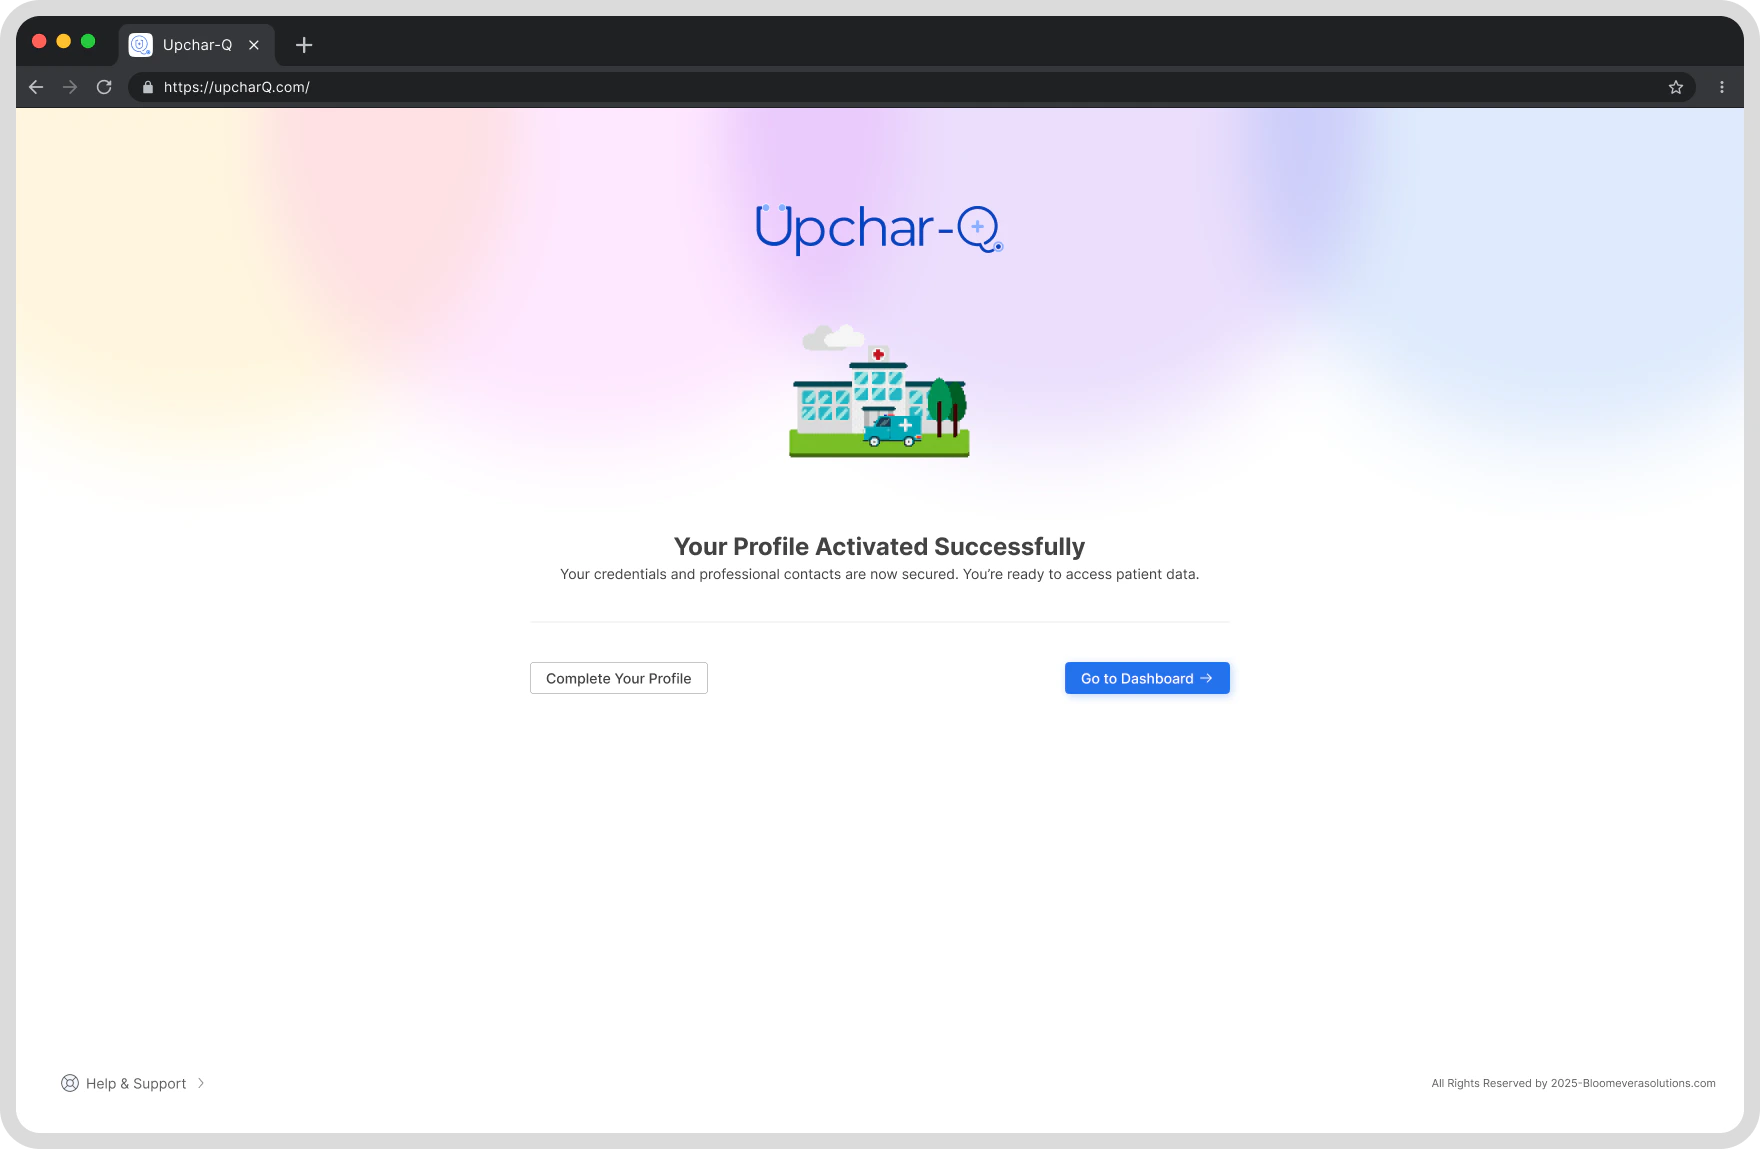 ## Step 6: Access Your Dashboard
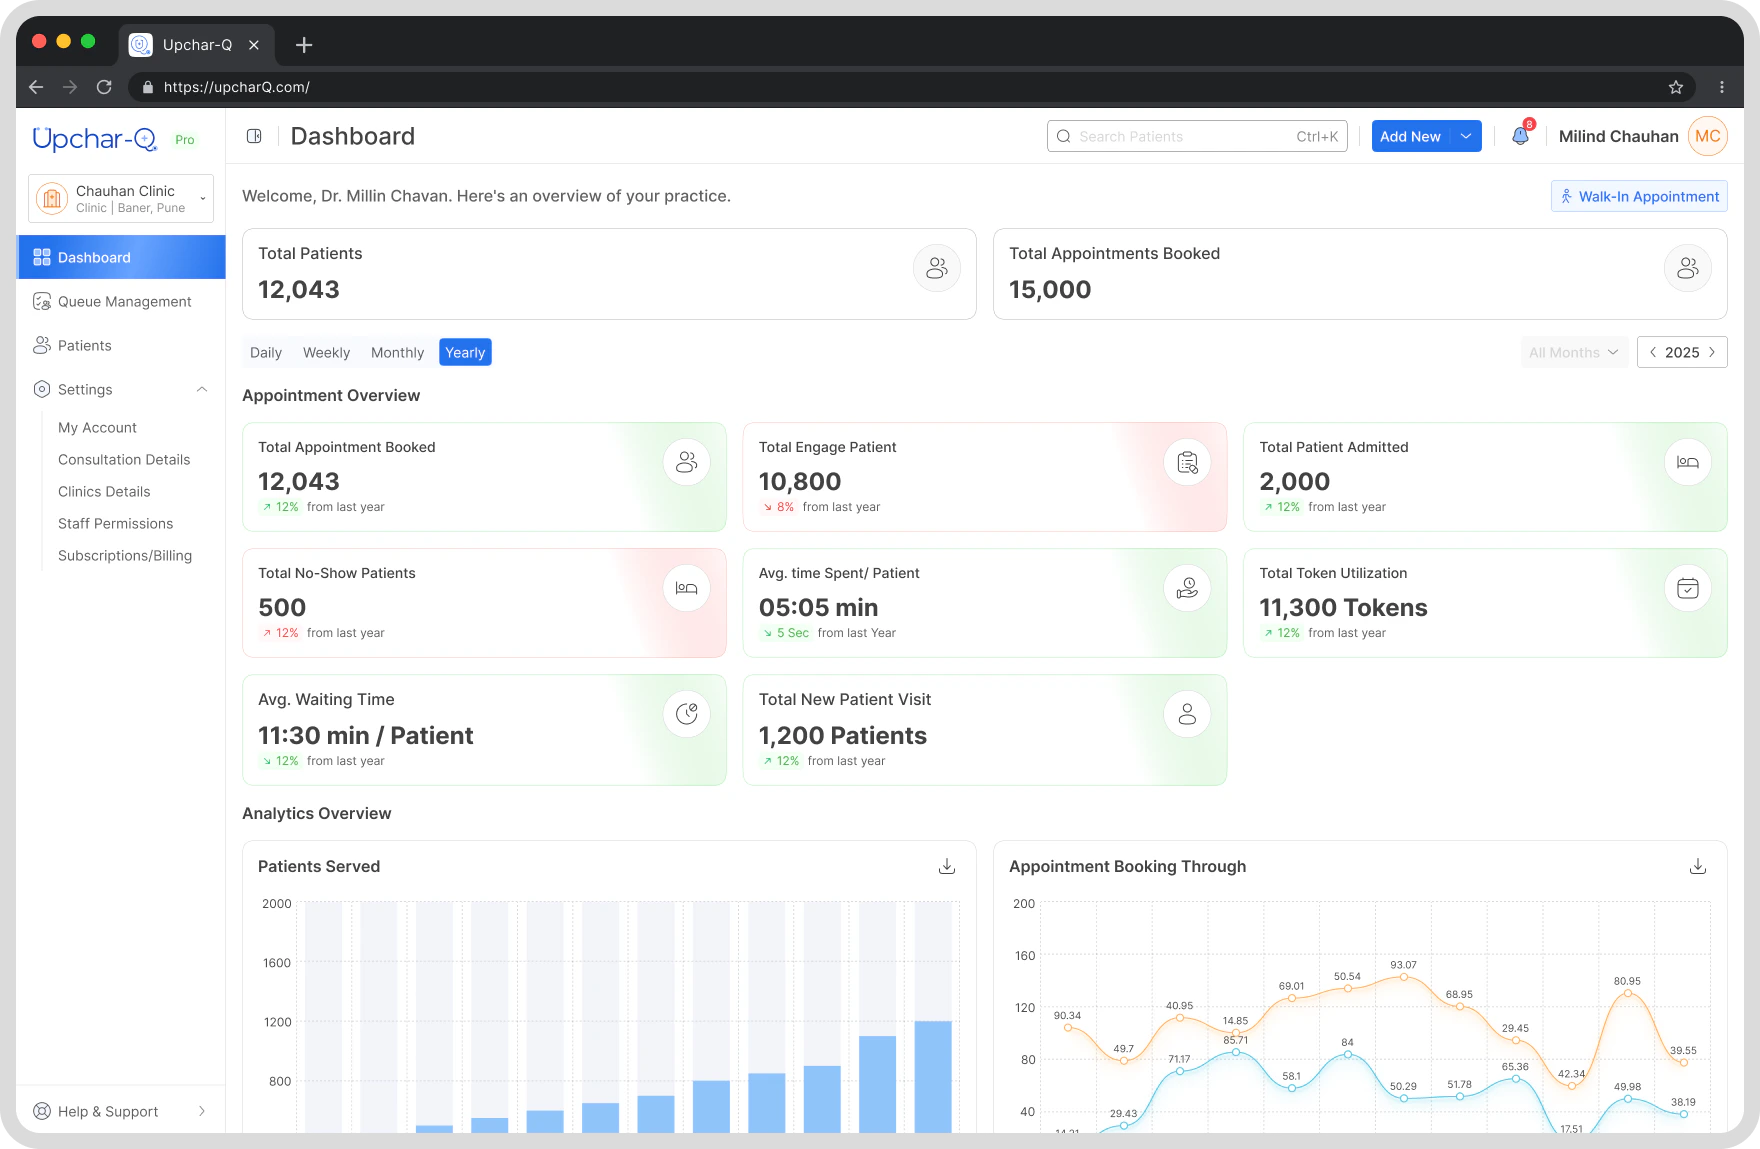
Once payment and verification are complete, you will be automatically redirected to the **Upchar-Q Doctor Dashboard**.
From your dashboard, you can:
* View Today's Queue
* Manage Patient Consultations
* Monitor Appointments
* Track Queue Status
* Access Hospital Information
* Receive Real-Time Notifications
Your account is now fully activated and ready for use.
## Step 6: Access Your Dashboard
Once payment and verification are complete, you will be automatically redirected to the **Upchar-Q Doctor Dashboard**.
From your dashboard, you can:
* View Today's Queue
* Manage Patient Consultations
* Monitor Appointments
* Track Queue Status
* Access Hospital Information
* Receive Real-Time Notifications
Your account is now fully activated and ready for use.
 ## What Happens Next?
After activation, you can immediately begin using Upchar-Q to manage your daily consultations and patient queue.
For detailed instructions on queue management, appointments, and consultation workflows, continue to the **Doctor User Guide**.
## Need Help?
If you experience any issues during activation:
* Contact the **Upchar-Q Support Team**
* Ensure you are using the **registered mobile number and email address** associated with your account
***
*Thank you for choosing Upchar-Q.* **Smart Queue Management for Modern Healthcare.**
## What Happens Next?
After activation, you can immediately begin using Upchar-Q to manage your daily consultations and patient queue.
For detailed instructions on queue management, appointments, and consultation workflows, continue to the **Doctor User Guide**.
## Need Help?
If you experience any issues during activation:
* Contact the **Upchar-Q Support Team**
* Ensure you are using the **registered mobile number and email address** associated with your account
***
*Thank you for choosing Upchar-Q.* **Smart Queue Management for Modern Healthcare.**