> ## Documentation Index
> Fetch the complete documentation index at: https://guide.upcharq.com/llms.txt
> Use this file to discover all available pages before exploring further.
# Hospital Admin Quick Start
> Set up your hospital on UpcharQ.
## Welcome to Upchar-Q!
Your hospital account has already been created by the Upchar-Q Team. To begin using the platform, you must activate your account by verifying your contact details and completing the account setup process.
**Estimated Setup Time:** 2–3 minutes
## Before You Begin
Before starting the activation process, ensure you have access to:
* Your registered **Mobile Number**
* Your registered **Email Address**
* The **activation link** provided by Upchar-Q
The Upchar-Q Super Admin has already configured your hospital profile and organization details.
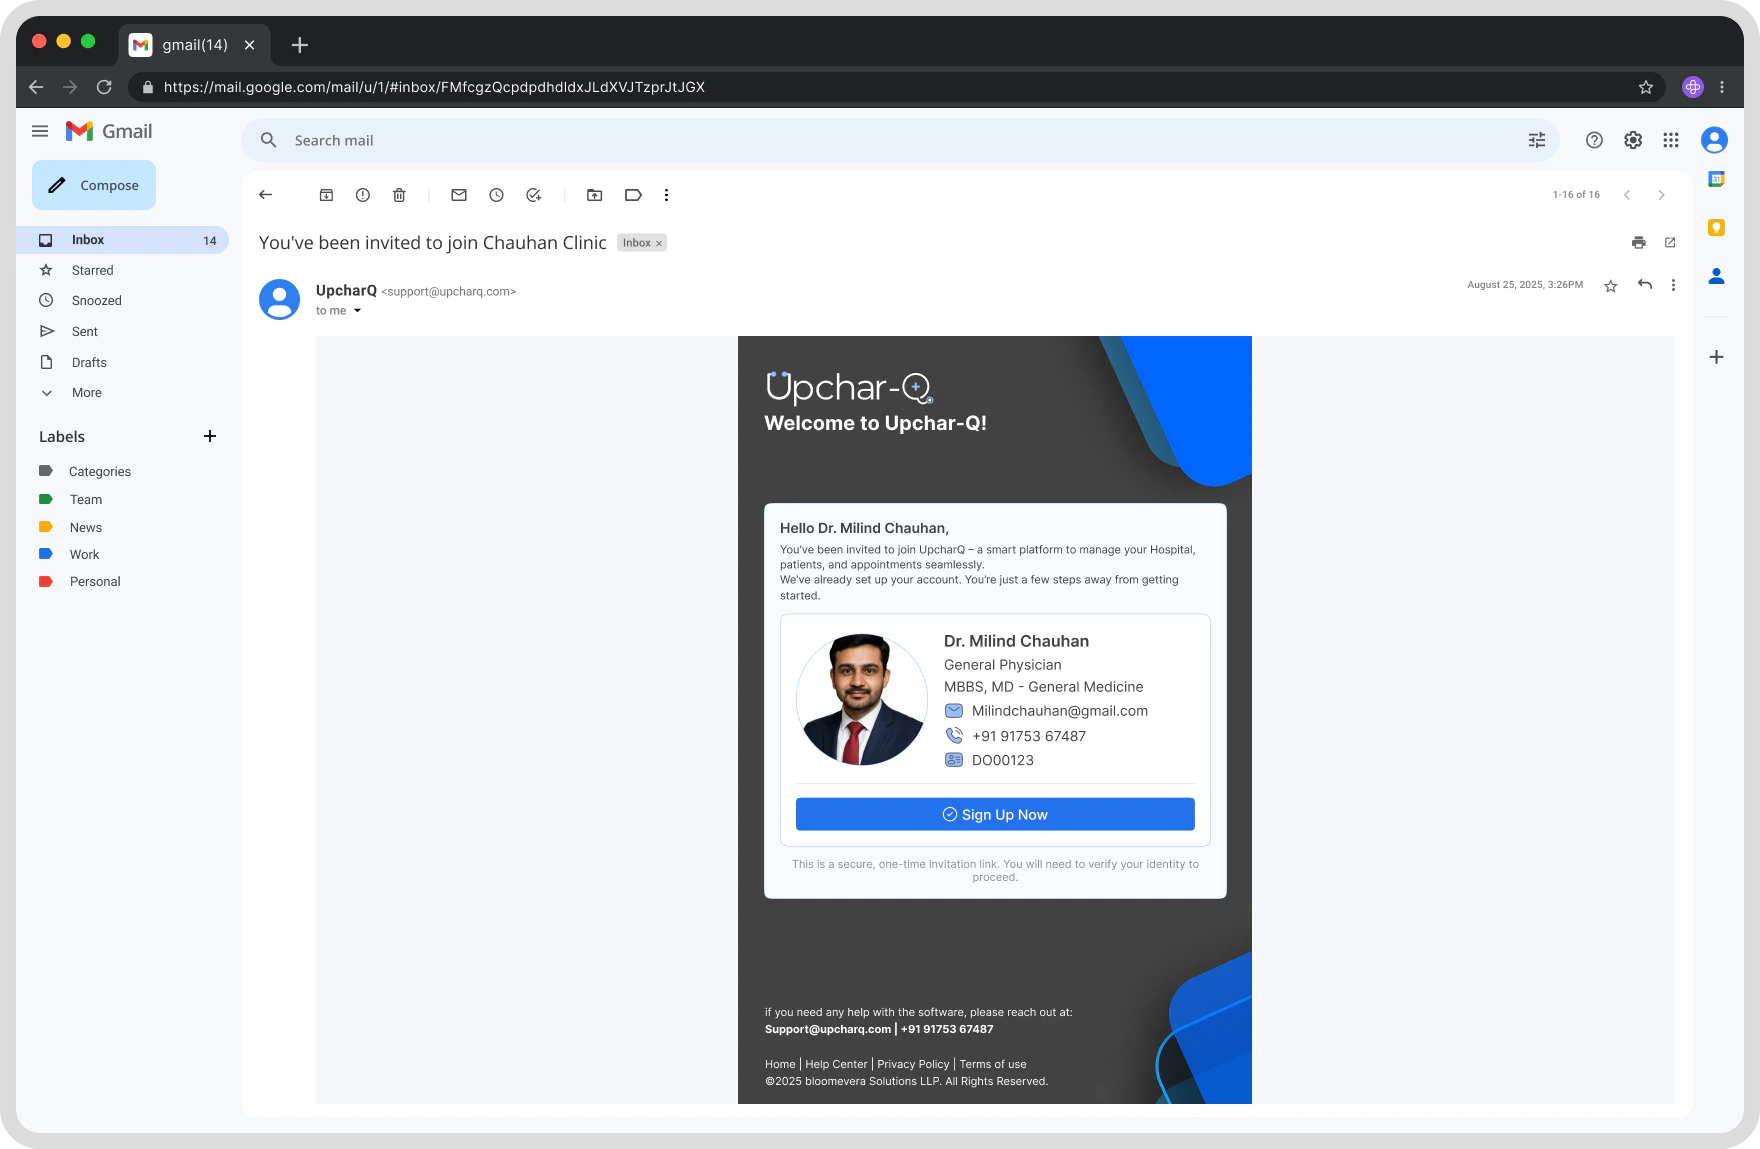
## Step 1: Open Your Activation Link
Click the activation link shared by the Upchar-Q Team. You will be redirected to the **Hospital Account Activation** page.
Review the information displayed, including:
* Hospital Name
* Registered Mobile Number
* Registered Email Address
* Subscription Plan Details
If all information is correct, click **Continue**.
 ## Step 2: Verify Your Mobile Number and Email Address
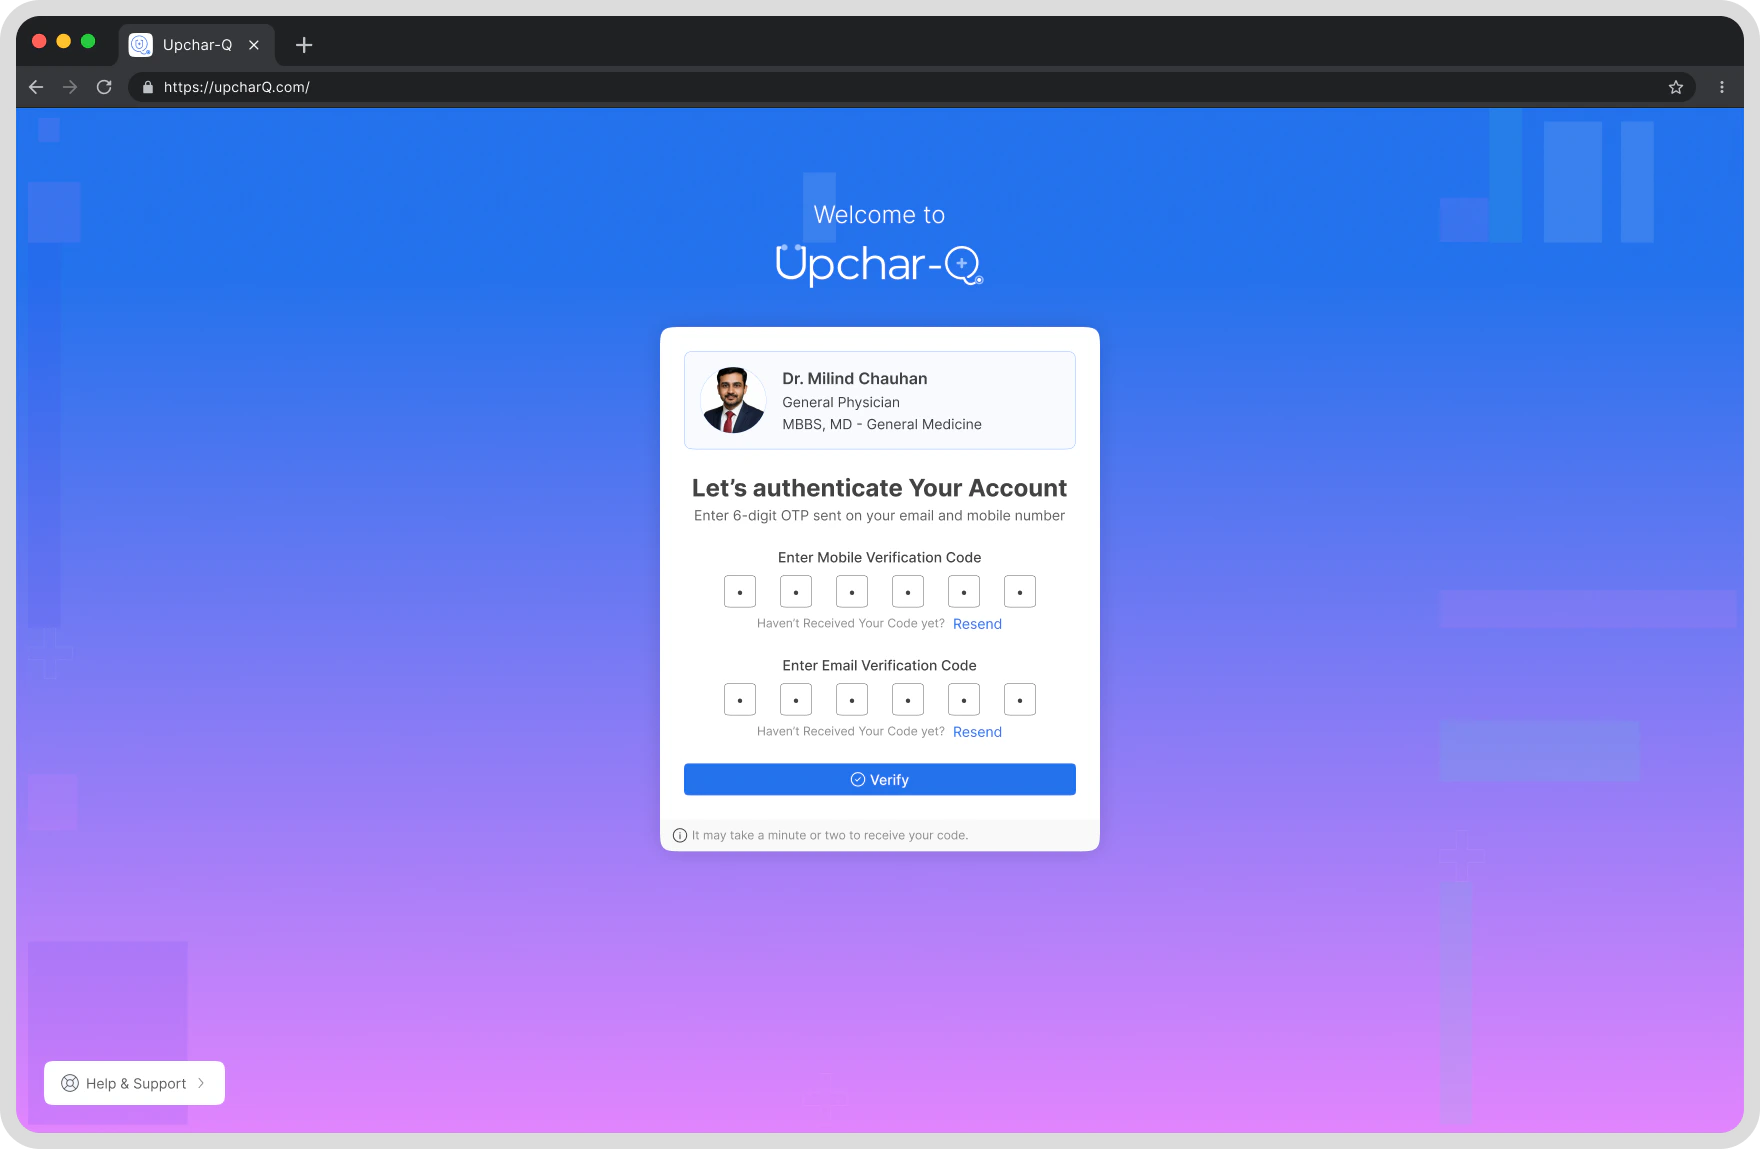
As soon as you open the activation link, Upchar-Q **automatically sends an OTP to both** your registered mobile number and email address. You don't need to click anything to trigger them — just enter the codes when they arrive.
Enter the OTP received on your registered mobile number.
Enter the verification code received in your registered email inbox.
Click **Verify** to confirm both your mobile and email at once.
Once verified, a success indicator will appear for both mobile and email.
* Check your mobile network connection and your email spam/junk folder.
* Wait a few moments and try again.
* Use the **Resend OTP** option to request a new code.
## Step 2: Verify Your Mobile Number and Email Address
As soon as you open the activation link, Upchar-Q **automatically sends an OTP to both** your registered mobile number and email address. You don't need to click anything to trigger them — just enter the codes when they arrive.
Enter the OTP received on your registered mobile number.
Enter the verification code received in your registered email inbox.
Click **Verify** to confirm both your mobile and email at once.
Once verified, a success indicator will appear for both mobile and email.
* Check your mobile network connection and your email spam/junk folder.
* Wait a few moments and try again.
* Use the **Resend OTP** option to request a new code.
 ## Step 3: Create Your Password
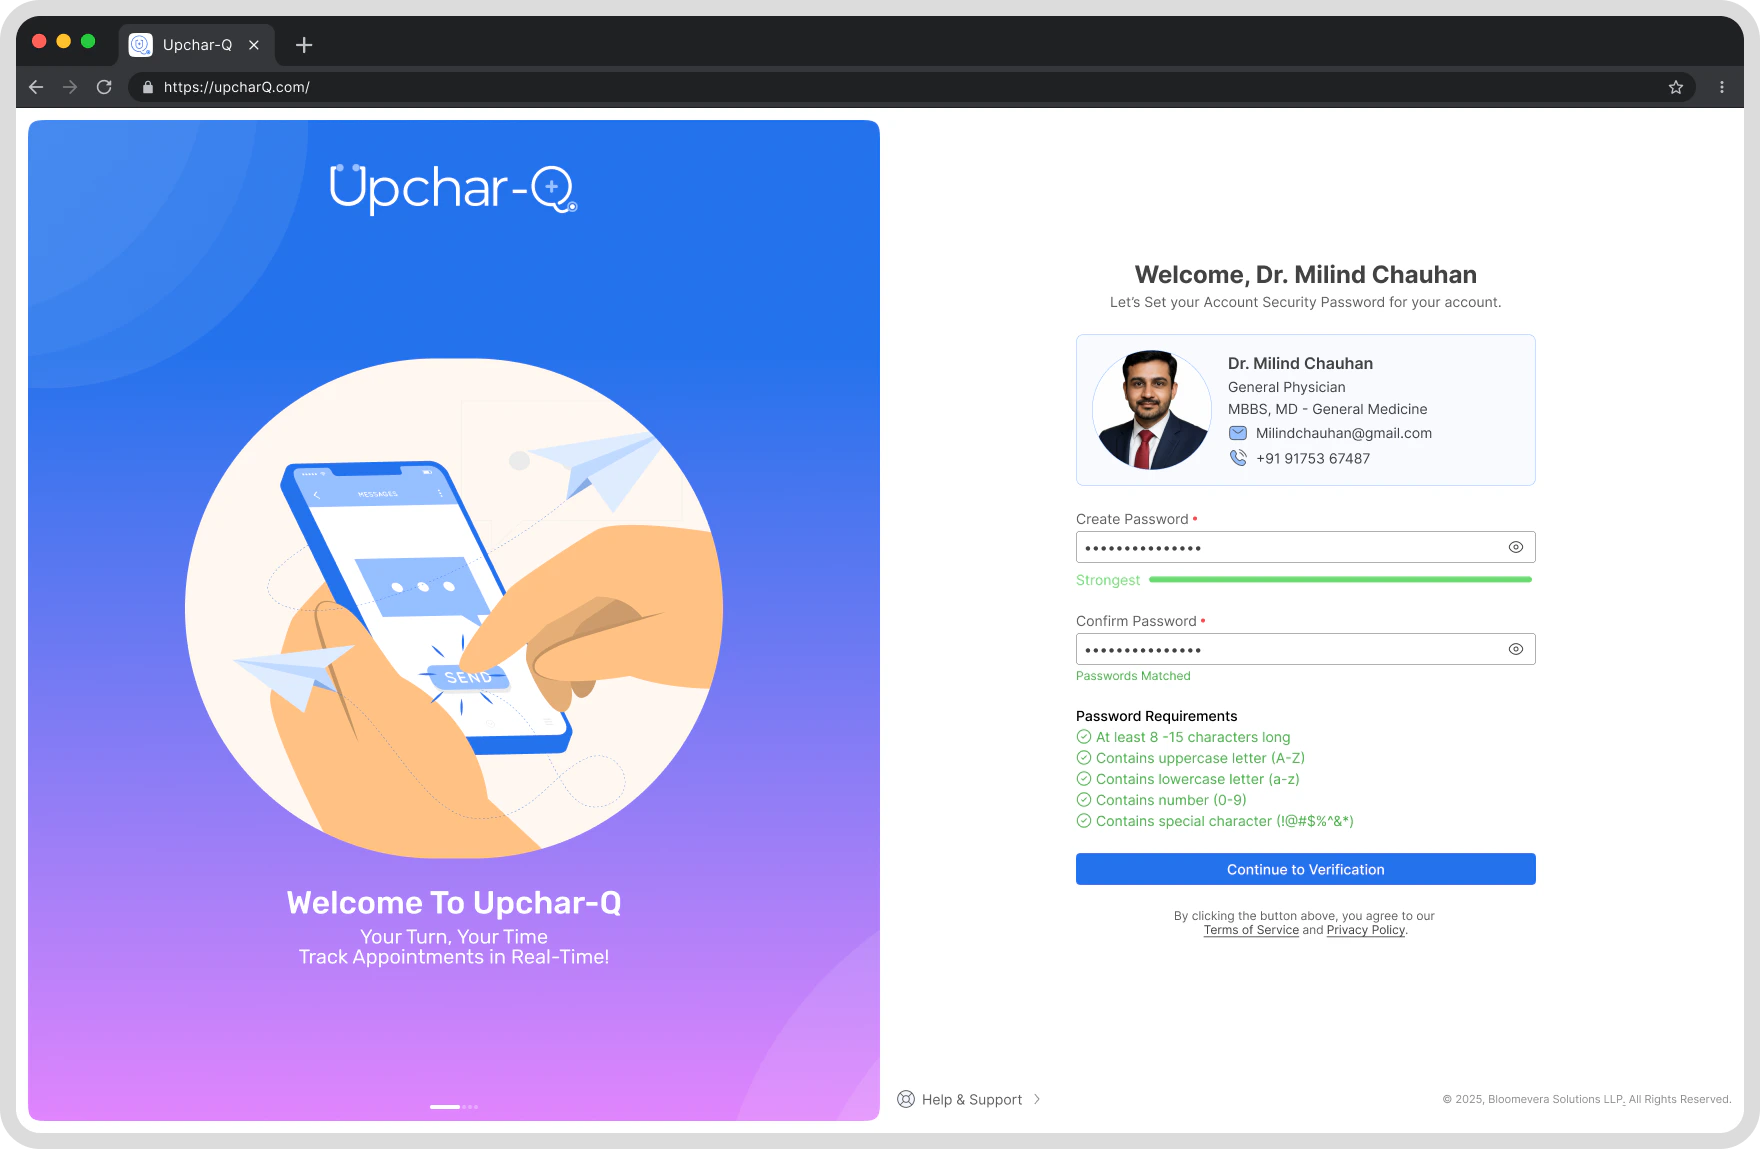
After verifying both your mobile number and email address, create a secure password for your account.
### Password Requirements
Your password should:
* Be at least **8 characters** long
* Include **uppercase** and **lowercase** letters
* Include at least one **numeric value**
* Include at least one **special character**
### Setup Process
1. Enter your new password.
2. Confirm your password.
3. Click **Continue**.
Your account credentials are now securely configured.
## Step 3: Create Your Password
After verifying both your mobile number and email address, create a secure password for your account.
### Password Requirements
Your password should:
* Be at least **8 characters** long
* Include **uppercase** and **lowercase** letters
* Include at least one **numeric value**
* Include at least one **special character**
### Setup Process
1. Enter your new password.
2. Confirm your password.
3. Click **Continue**.
Your account credentials are now securely configured.
 ## Step 4: Complete Subscription Payment (If Applicable)
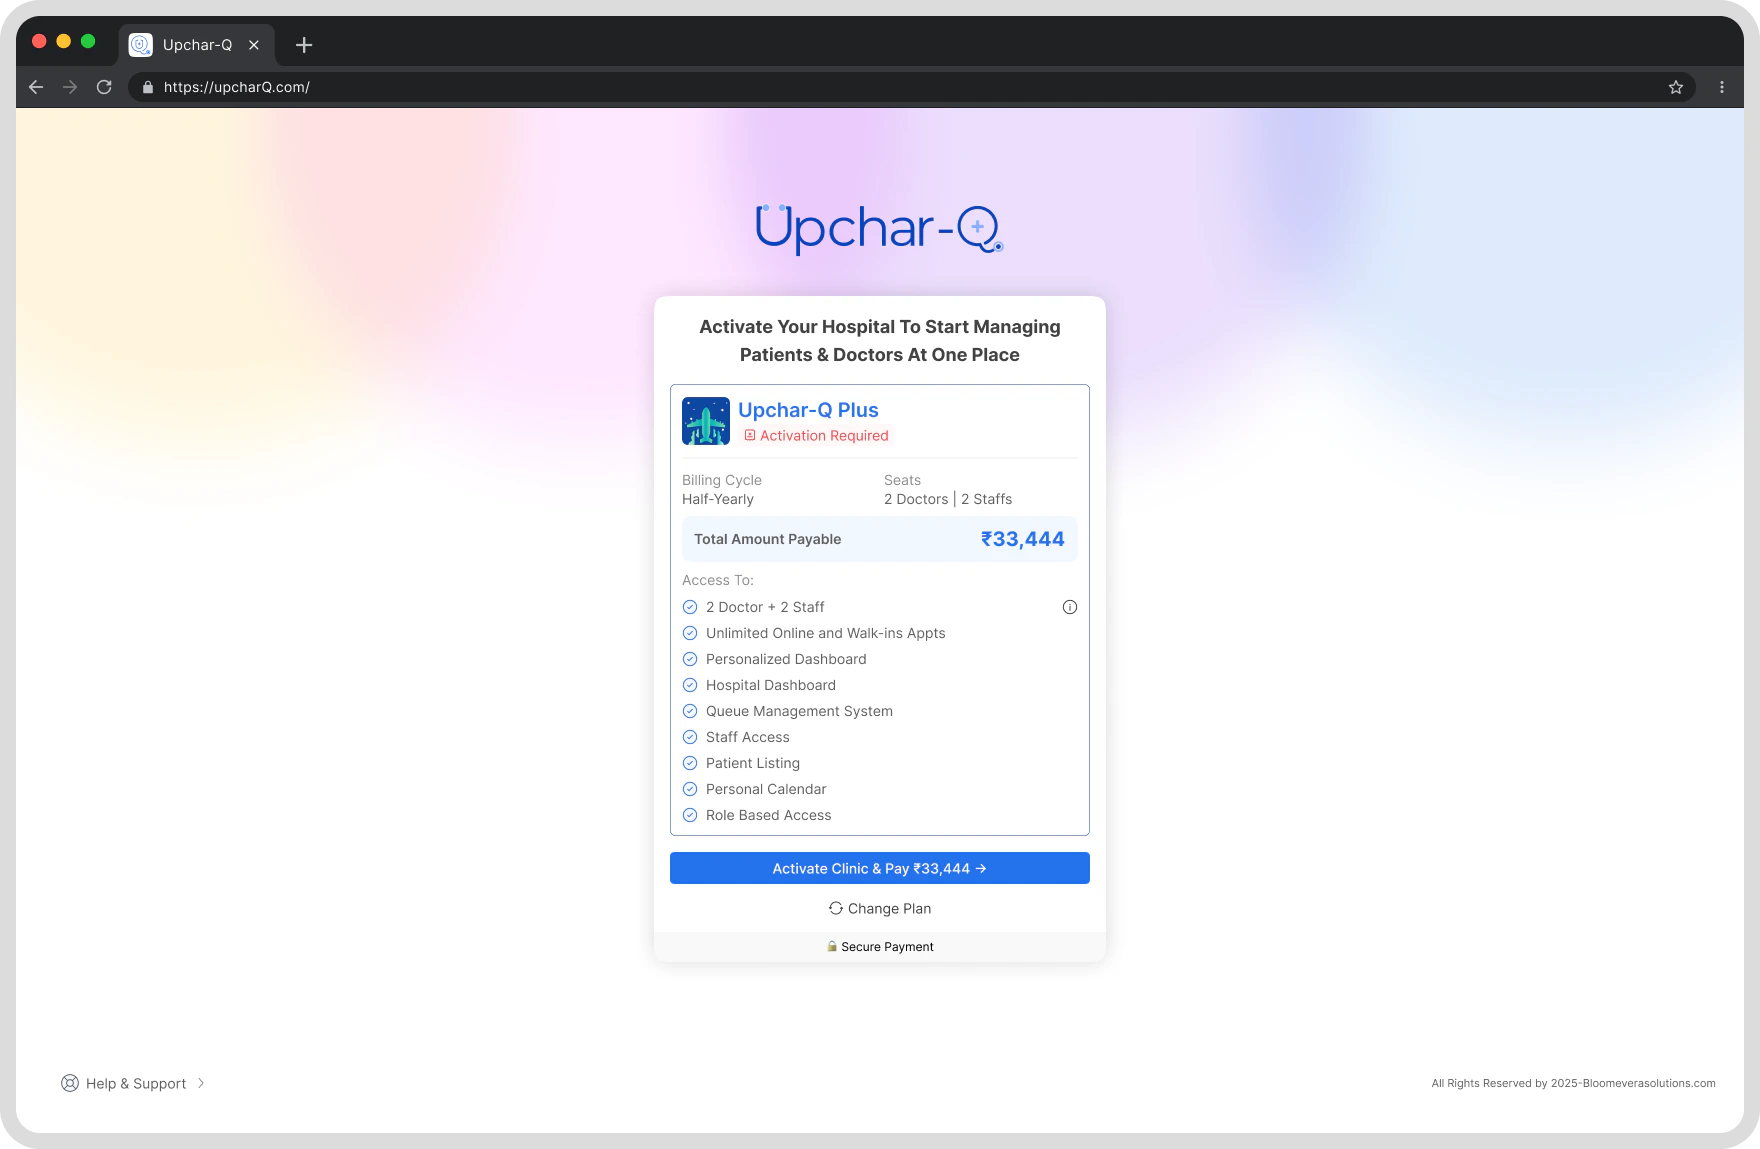
Depending on the subscription plan assigned to your hospital, payment may be required before accessing the platform.
If your account is assigned to a paid plan:
1. Click **Proceed to Payment**.
2. You will be redirected to the secure **PhonePe Payment Gateway**.
3. Complete the payment using your preferred payment method.
Supported payment methods may include:
## Step 4: Complete Subscription Payment (If Applicable)
Depending on the subscription plan assigned to your hospital, payment may be required before accessing the platform.
If your account is assigned to a paid plan:
1. Click **Proceed to Payment**.
2. You will be redirected to the secure **PhonePe Payment Gateway**.
3. Complete the payment using your preferred payment method.
Supported payment methods may include:
 ## Step 5: Payment Confirmation
After successful payment:
* Your subscription will be activated automatically.
* Payment status will be updated in real time.
* Your hospital account will be activated immediately.
No additional approval is required.
## Step 5: Payment Confirmation
After successful payment:
* Your subscription will be activated automatically.
* Payment status will be updated in real time.
* Your hospital account will be activated immediately.
No additional approval is required.
 ## Step 6: Access Your Hospital Dashboard
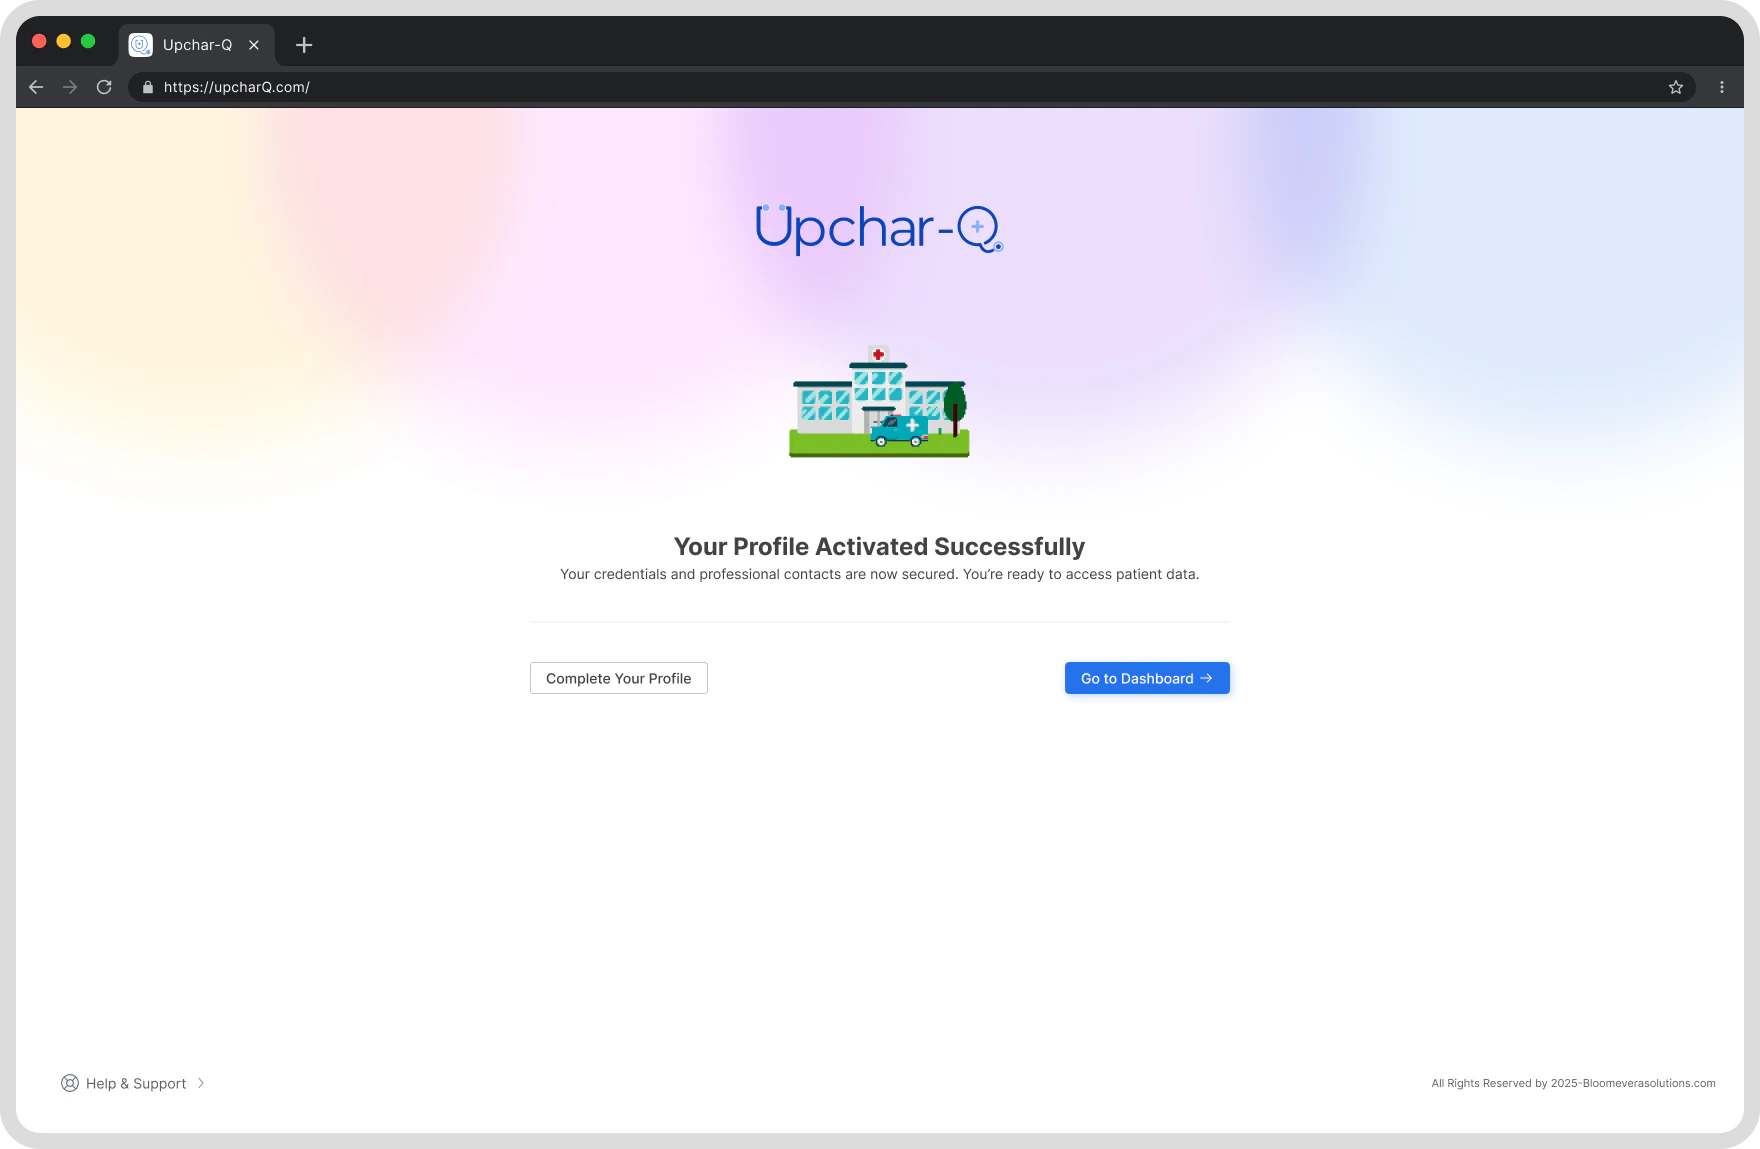
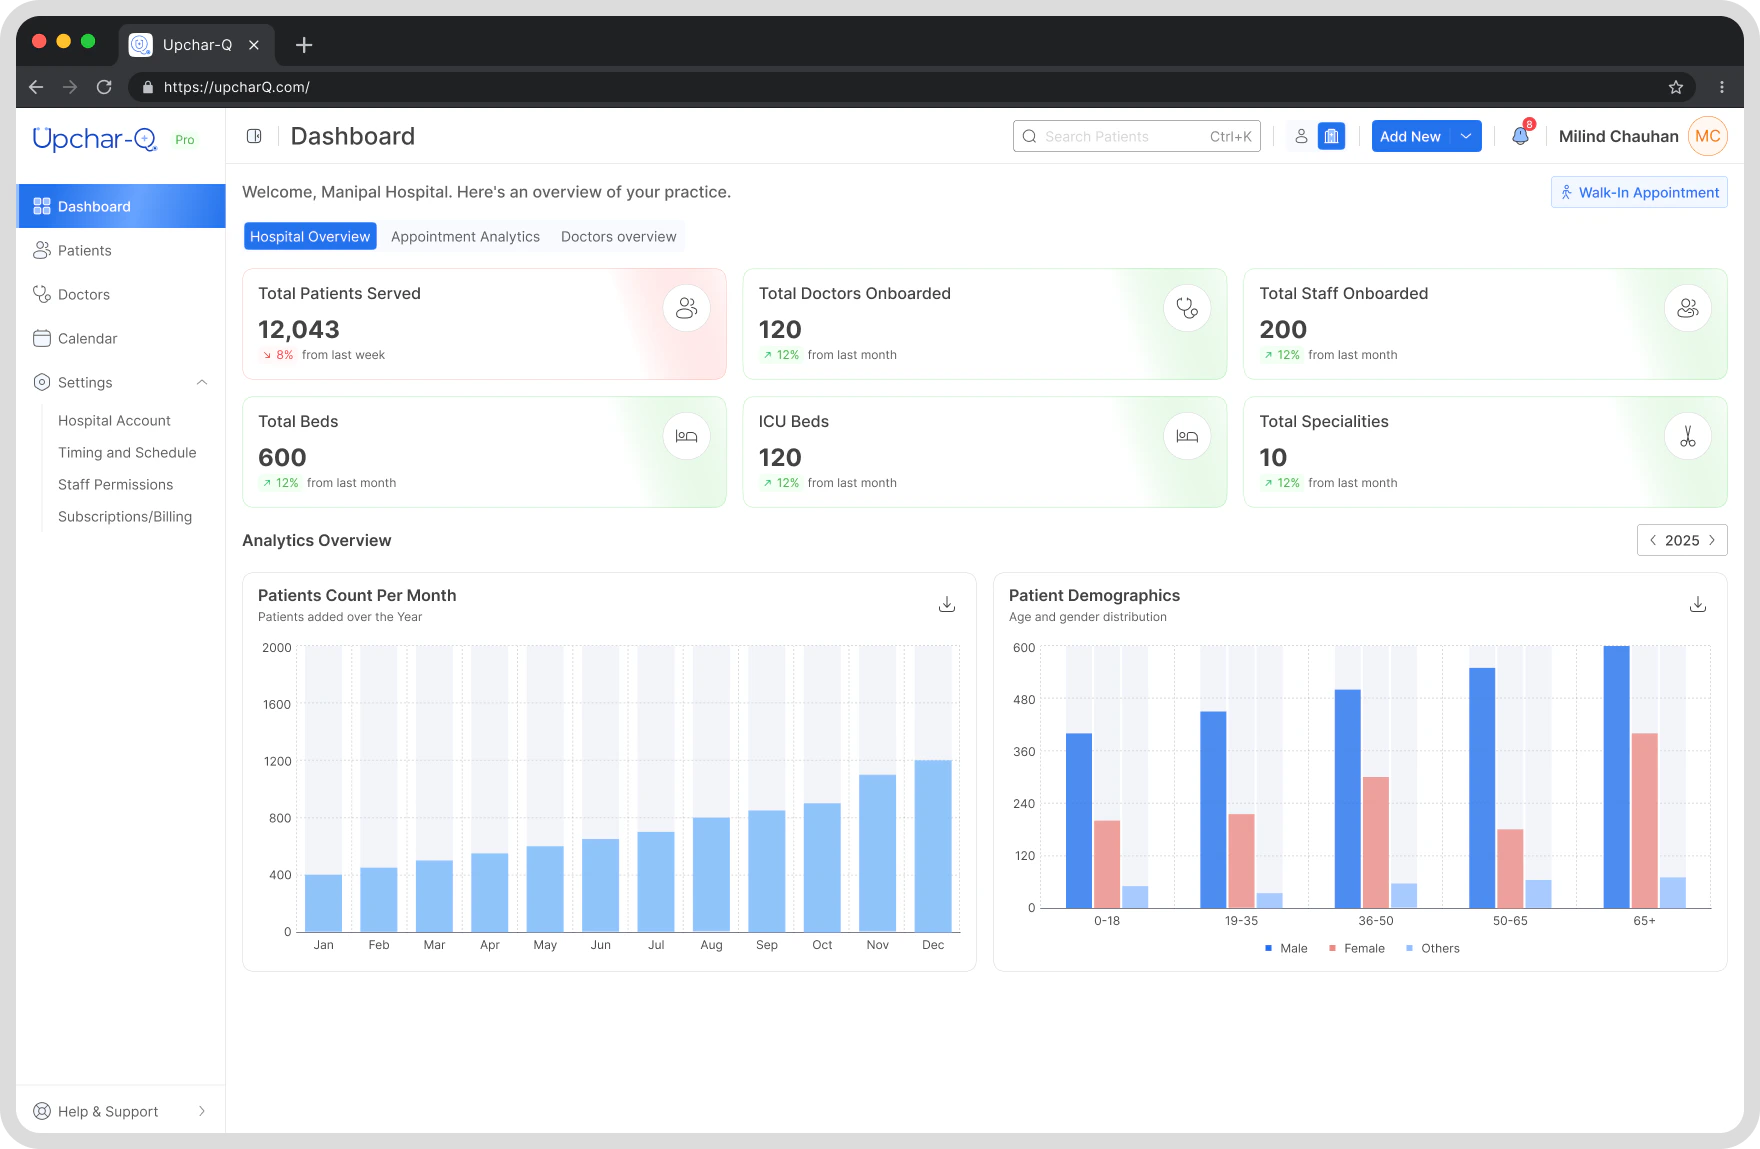
Once verification and payment are complete, you will be automatically redirected to the **Upchar-Q Hospital Dashboard**.
From your dashboard, you can manage your organization's operations and users.
## What Can You Do Next?
As a Hospital Administrator, you can:
Invite doctors, associate them with your hospital, view doctor information, and manage doctor access.
Invite staff members, assign roles and permissions, and activate or deactivate staff accounts.
Monitor active queues, view queue performance, and track daily operations.
View your current plan, monitor usage, renew your subscription, and access billing information.
Queue statistics, doctor utilization, and operational insights.
Your hospital account is now fully activated and ready for use.
## Step 6: Access Your Hospital Dashboard
Once verification and payment are complete, you will be automatically redirected to the **Upchar-Q Hospital Dashboard**.
From your dashboard, you can manage your organization's operations and users.
## What Can You Do Next?
As a Hospital Administrator, you can:
Invite doctors, associate them with your hospital, view doctor information, and manage doctor access.
Invite staff members, assign roles and permissions, and activate or deactivate staff accounts.
Monitor active queues, view queue performance, and track daily operations.
View your current plan, monitor usage, renew your subscription, and access billing information.
Queue statistics, doctor utilization, and operational insights.
Your hospital account is now fully activated and ready for use.
 Continue to the **Hospital Administrator User Guide** to learn more about managing doctors, staff, subscriptions, and daily operations.
## Need Help?
If you experience any issues during activation:
* Contact the **Upchar-Q Support Team**
* Verify that you are using the **registered mobile number and email address** associated with your account
* Ensure your **activation link is valid and active**
***
*Thank you for choosing Upchar-Q.* **Empowering Healthcare Operations Through Smarter Queue Management.**
Continue to the **Hospital Administrator User Guide** to learn more about managing doctors, staff, subscriptions, and daily operations.
## Need Help?
If you experience any issues during activation:
* Contact the **Upchar-Q Support Team**
* Verify that you are using the **registered mobile number and email address** associated with your account
* Ensure your **activation link is valid and active**
***
*Thank you for choosing Upchar-Q.* **Empowering Healthcare Operations Through Smarter Queue Management.**