> ## Documentation Index
> Fetch the complete documentation index at: https://guide.upcharq.com/llms.txt
> Use this file to discover all available pages before exploring further.
# Staff Quick Start
> Get started as clinic staff on UpcharQ.
## Welcome to Upchar-Q!
Your staff account has already been created by your **Hospital Administrator** or **Clinic Administrator**. To begin using Upchar-Q, you must activate your account by verifying your contact details and creating a secure password.
**Estimated Setup Time:** 2–3 minutes
## Before You Begin
Before starting the activation process, ensure you have access to:
* Your registered **Mobile Number**
* Your registered **Email Address**
* The **activation link** shared by your Hospital or Clinic Administrator
Your profile and organization details have already been configured for you.
## Step 1: Open Your Activation Link
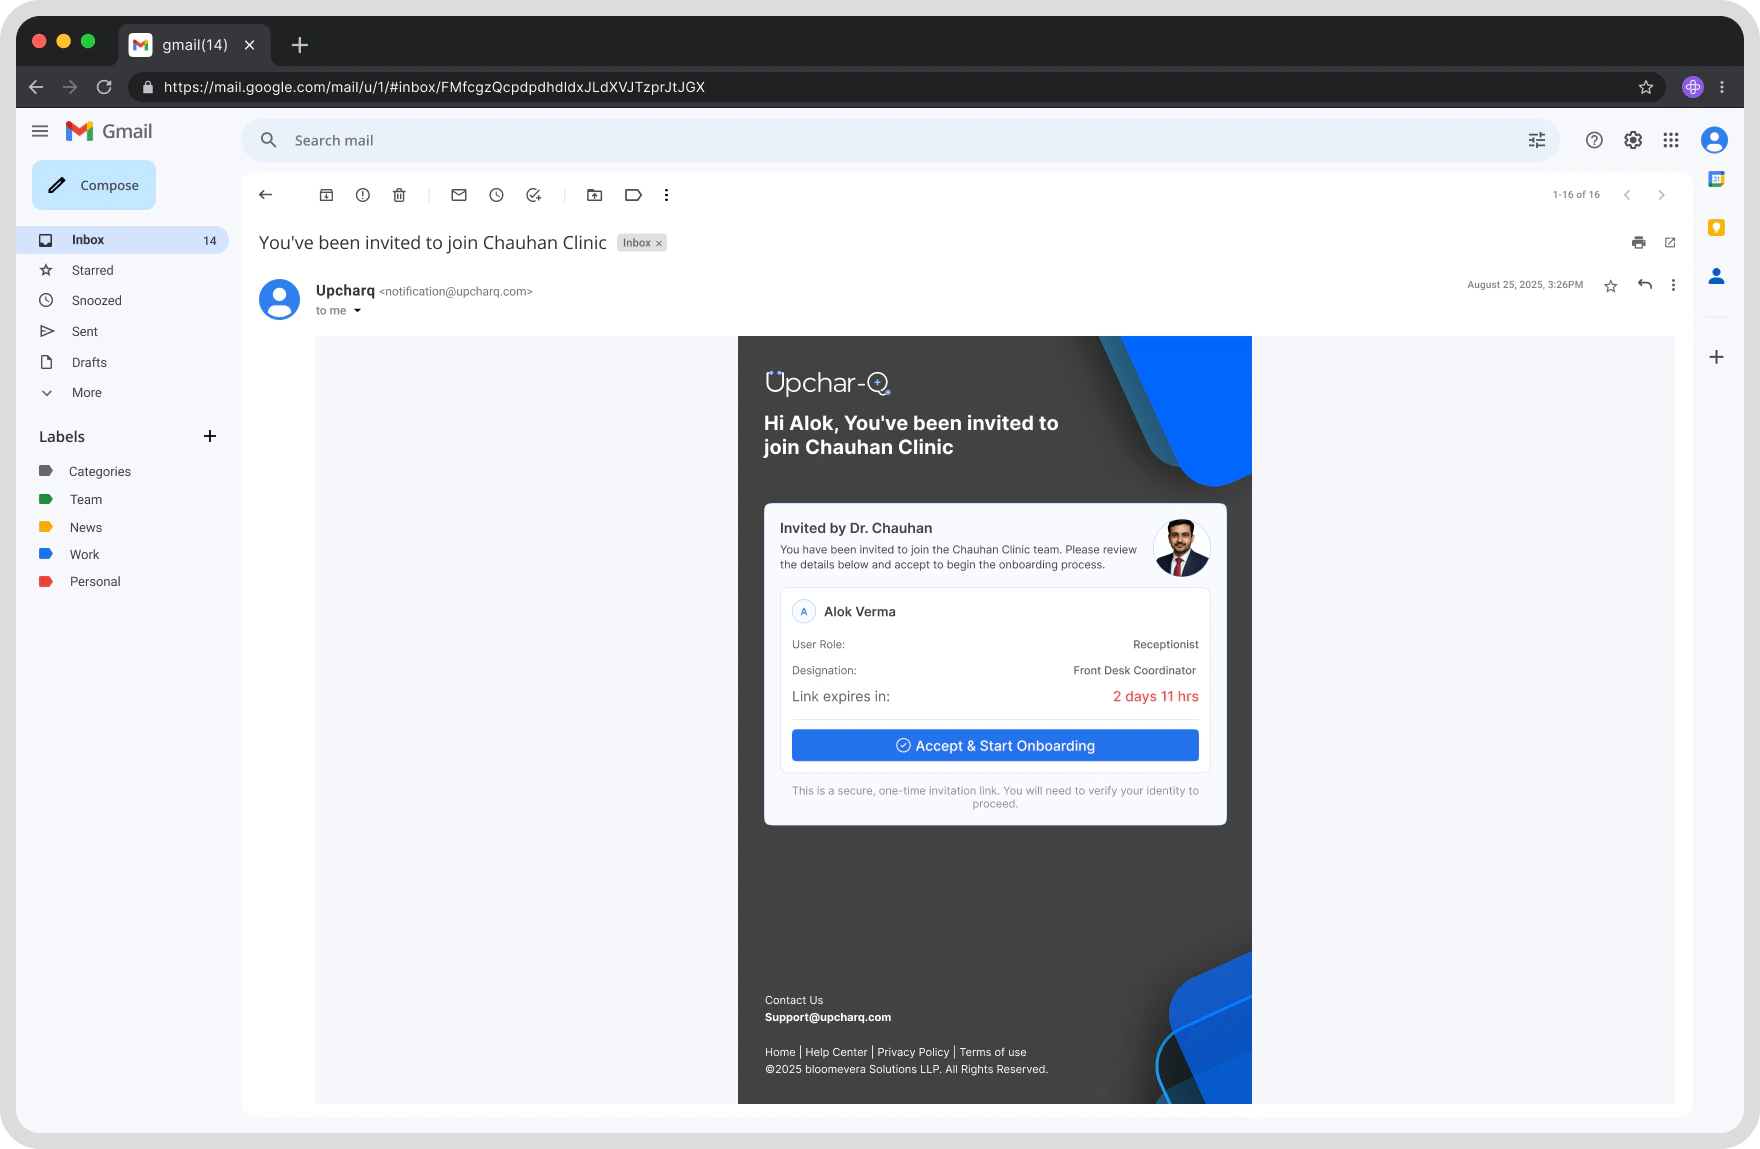
Click the activation link provided by your Hospital or Clinic Administrator. You will be directed to the **Upchar-Q Staff Account Activation** page.
Review the information displayed, including:
* Staff Name
* Registered Mobile Number
* Registered Email Address
* Associated Hospital or Clinic
If the information is correct, click **Accept & Start Onboarding**.
 ## Step 2: Verify Your Mobile Number and Email Address
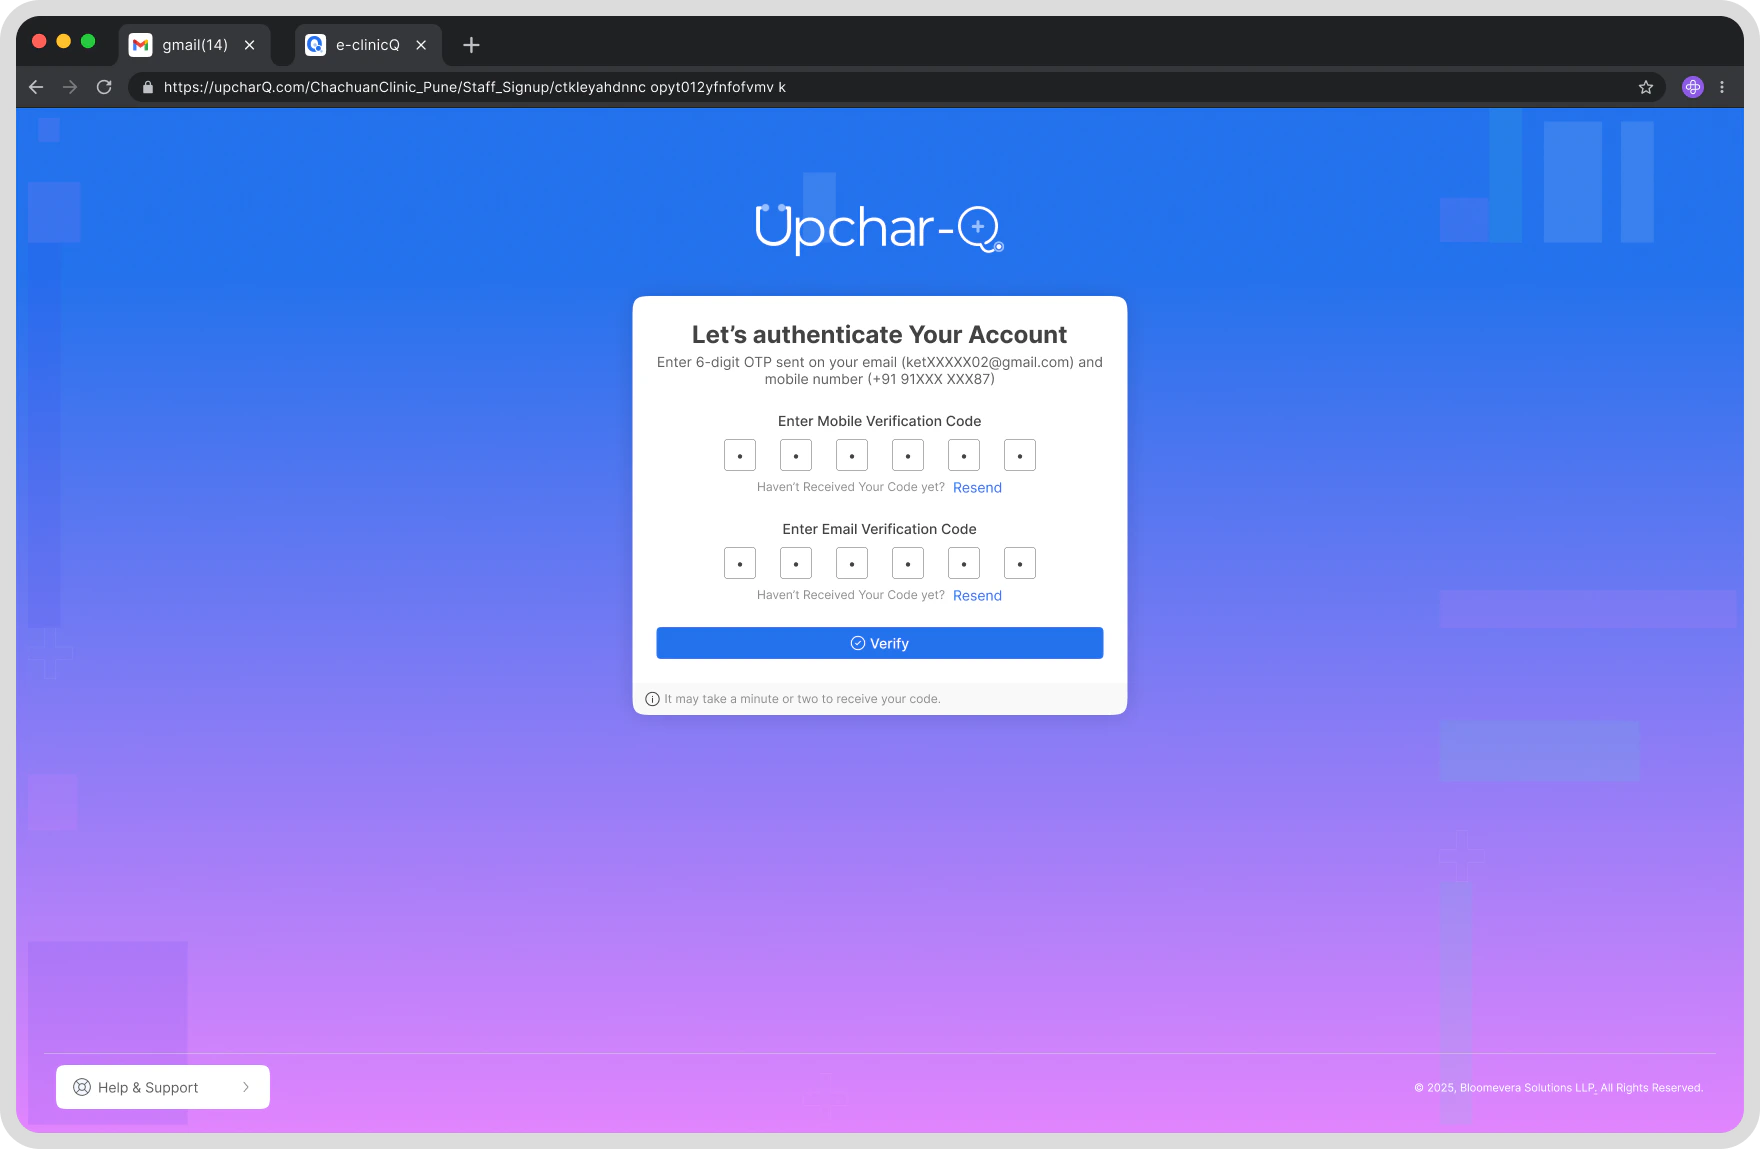
As soon as you open the activation link, UpcharQ **automatically sends an OTP to both** your registered mobile number and email address. You don't need to click anything to trigger them — enter the codes when they arrive.
Enter the OTP received via SMS on your registered mobile number.
Enter the verification code received in your registered email inbox.
Click **Verify** to confirm both your mobile and email at once.
Once verified, a success indicator will appear for both mobile and email.
* Check your mobile network connection and your email spam/junk folder.
* Wait a few moments before requesting another OTP.
* Use the **Resend OTP** option to request a new code.
## Step 2: Verify Your Mobile Number and Email Address
As soon as you open the activation link, UpcharQ **automatically sends an OTP to both** your registered mobile number and email address. You don't need to click anything to trigger them — enter the codes when they arrive.
Enter the OTP received via SMS on your registered mobile number.
Enter the verification code received in your registered email inbox.
Click **Verify** to confirm both your mobile and email at once.
Once verified, a success indicator will appear for both mobile and email.
* Check your mobile network connection and your email spam/junk folder.
* Wait a few moments before requesting another OTP.
* Use the **Resend OTP** option to request a new code.
 ## Step 3: Create Your Password
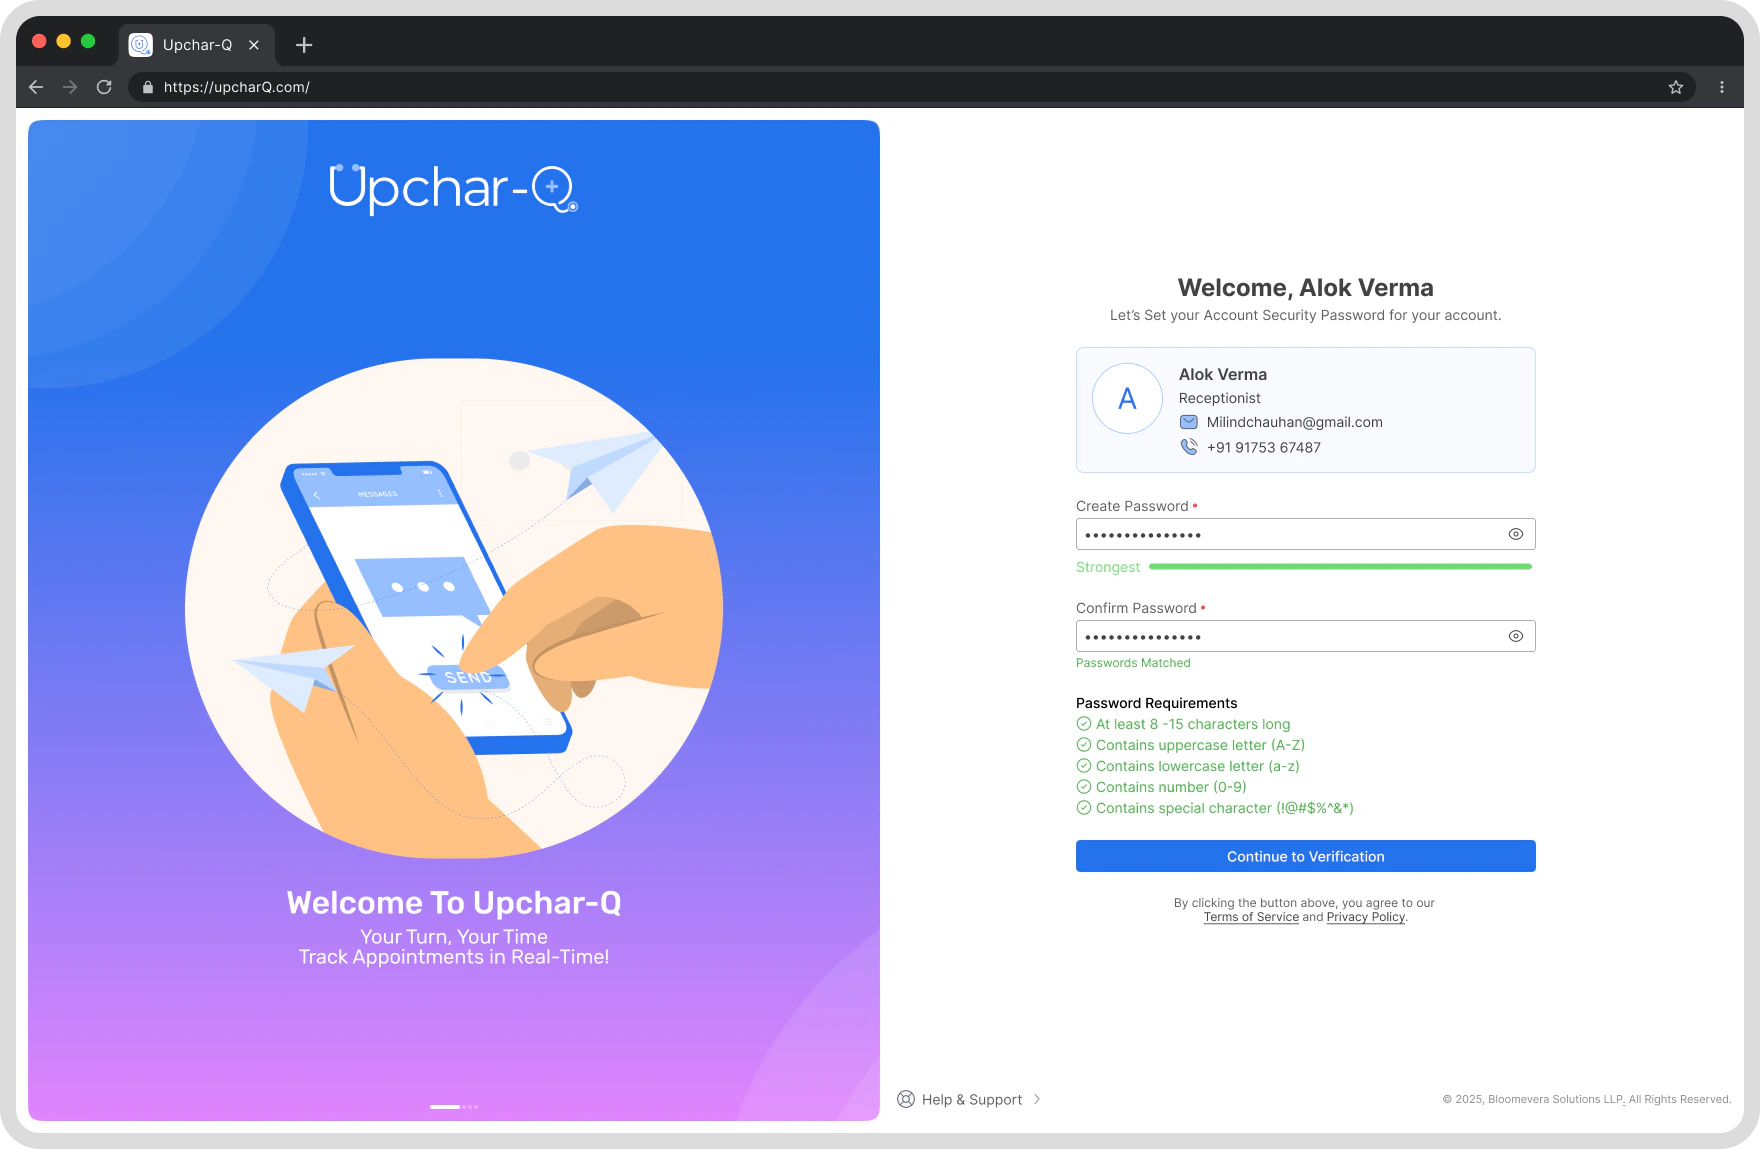
After verifying both your mobile number and email address, create a secure password for your account.
### Password Requirements
Your password should:
* Be at least **8 characters** long
* Include **uppercase** and **lowercase** letters
* Include at least one **numeric value**
* Include at least one **special character**
### Setup Process
1. Enter your new password.
2. Confirm your password.
3. Click **Continue**.
Your login credentials are now securely configured.
## Step 3: Create Your Password
After verifying both your mobile number and email address, create a secure password for your account.
### Password Requirements
Your password should:
* Be at least **8 characters** long
* Include **uppercase** and **lowercase** letters
* Include at least one **numeric value**
* Include at least one **special character**
### Setup Process
1. Enter your new password.
2. Confirm your password.
3. Click **Continue**.
Your login credentials are now securely configured.
 ## Step 4: Accept Terms & Privacy Policy
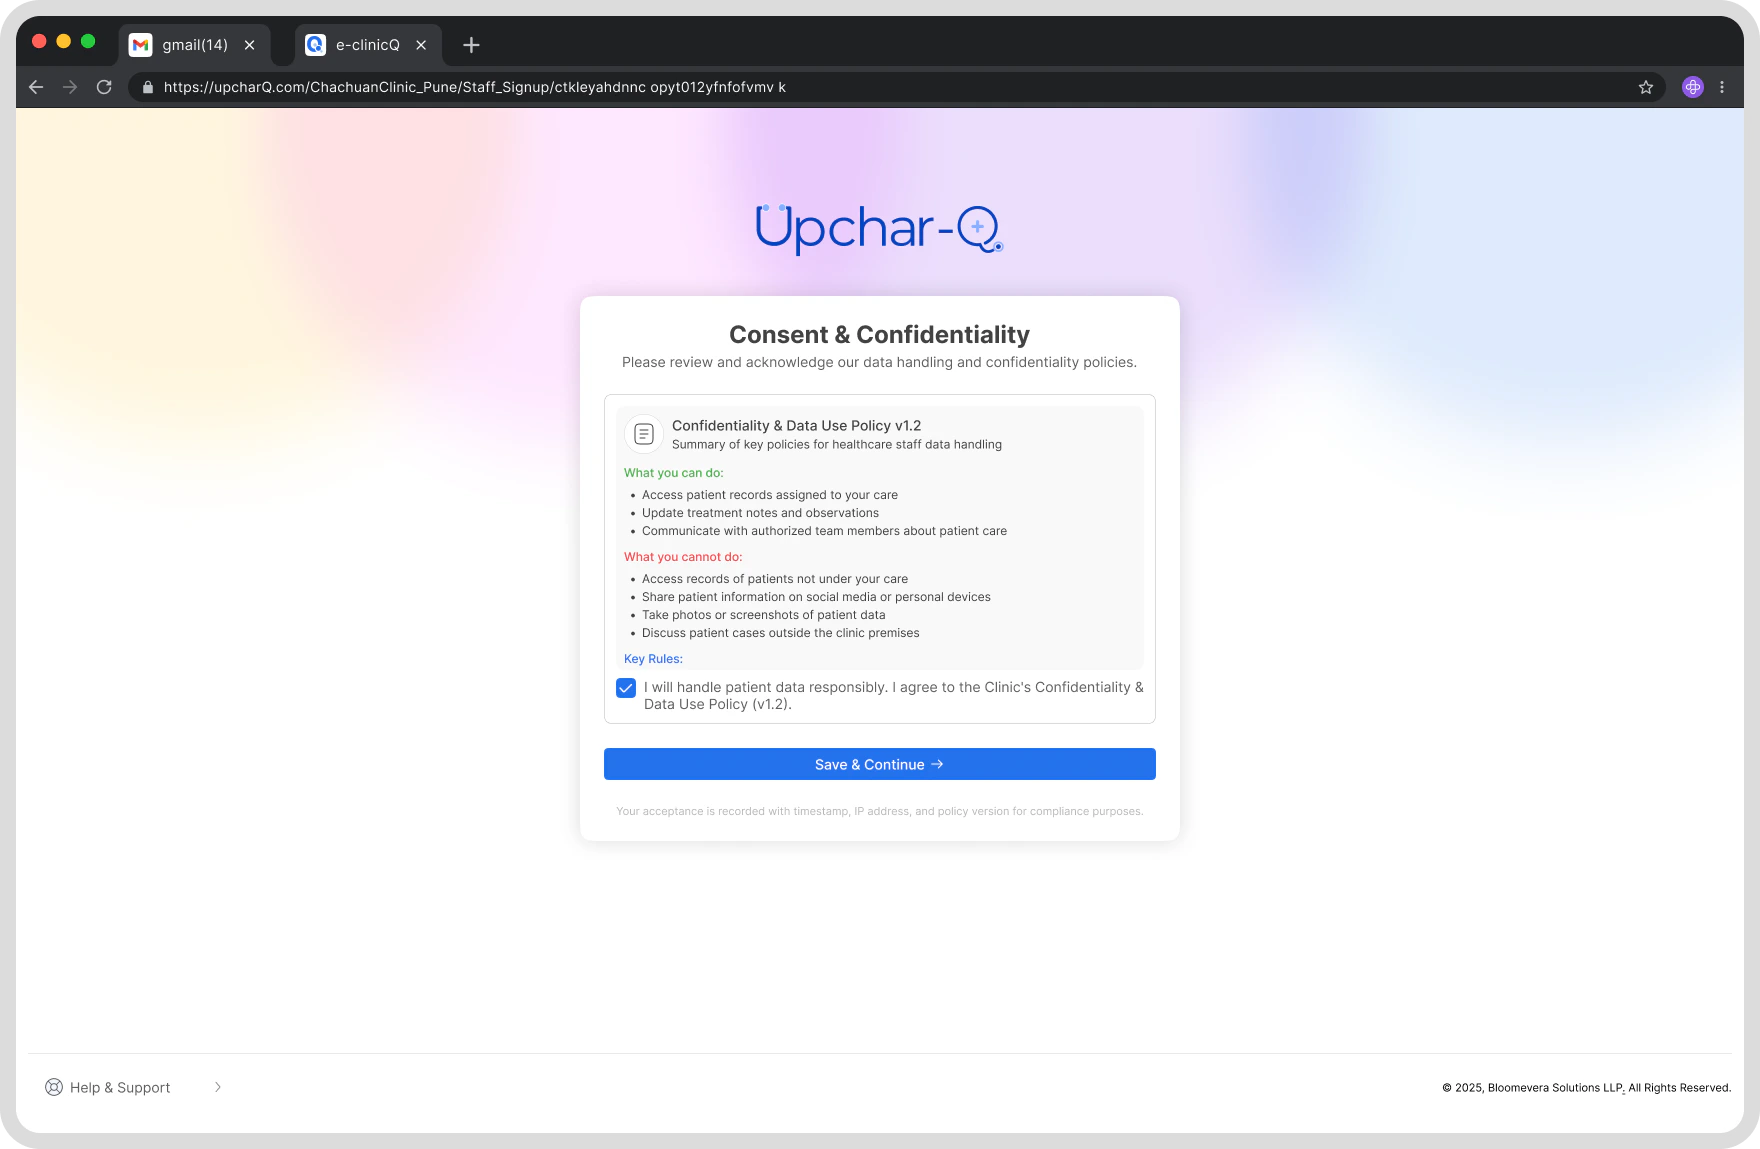
As a staff member, you may have access to patient information and healthcare-related records. Before accessing the platform, you must review and accept:
* **Terms & Conditions**
* **Privacy Policy**
* **Data Protection & Confidentiality Requirements**
### Your Responsibilities
By accepting these policies, you agree to:
* Protect patient privacy
* Maintain confidentiality of patient information
* Access data only for authorized purposes
* Follow organizational and healthcare compliance requirements
* Use Upchar-Q responsibly and ethically
To proceed:
1. Review the provided documents.
2. Select the acceptance checkbox.
3. Click **Accept & Continue**.
## Step 4: Accept Terms & Privacy Policy
As a staff member, you may have access to patient information and healthcare-related records. Before accessing the platform, you must review and accept:
* **Terms & Conditions**
* **Privacy Policy**
* **Data Protection & Confidentiality Requirements**
### Your Responsibilities
By accepting these policies, you agree to:
* Protect patient privacy
* Maintain confidentiality of patient information
* Access data only for authorized purposes
* Follow organizational and healthcare compliance requirements
* Use Upchar-Q responsibly and ethically
To proceed:
1. Review the provided documents.
2. Select the acceptance checkbox.
3. Click **Accept & Continue**.
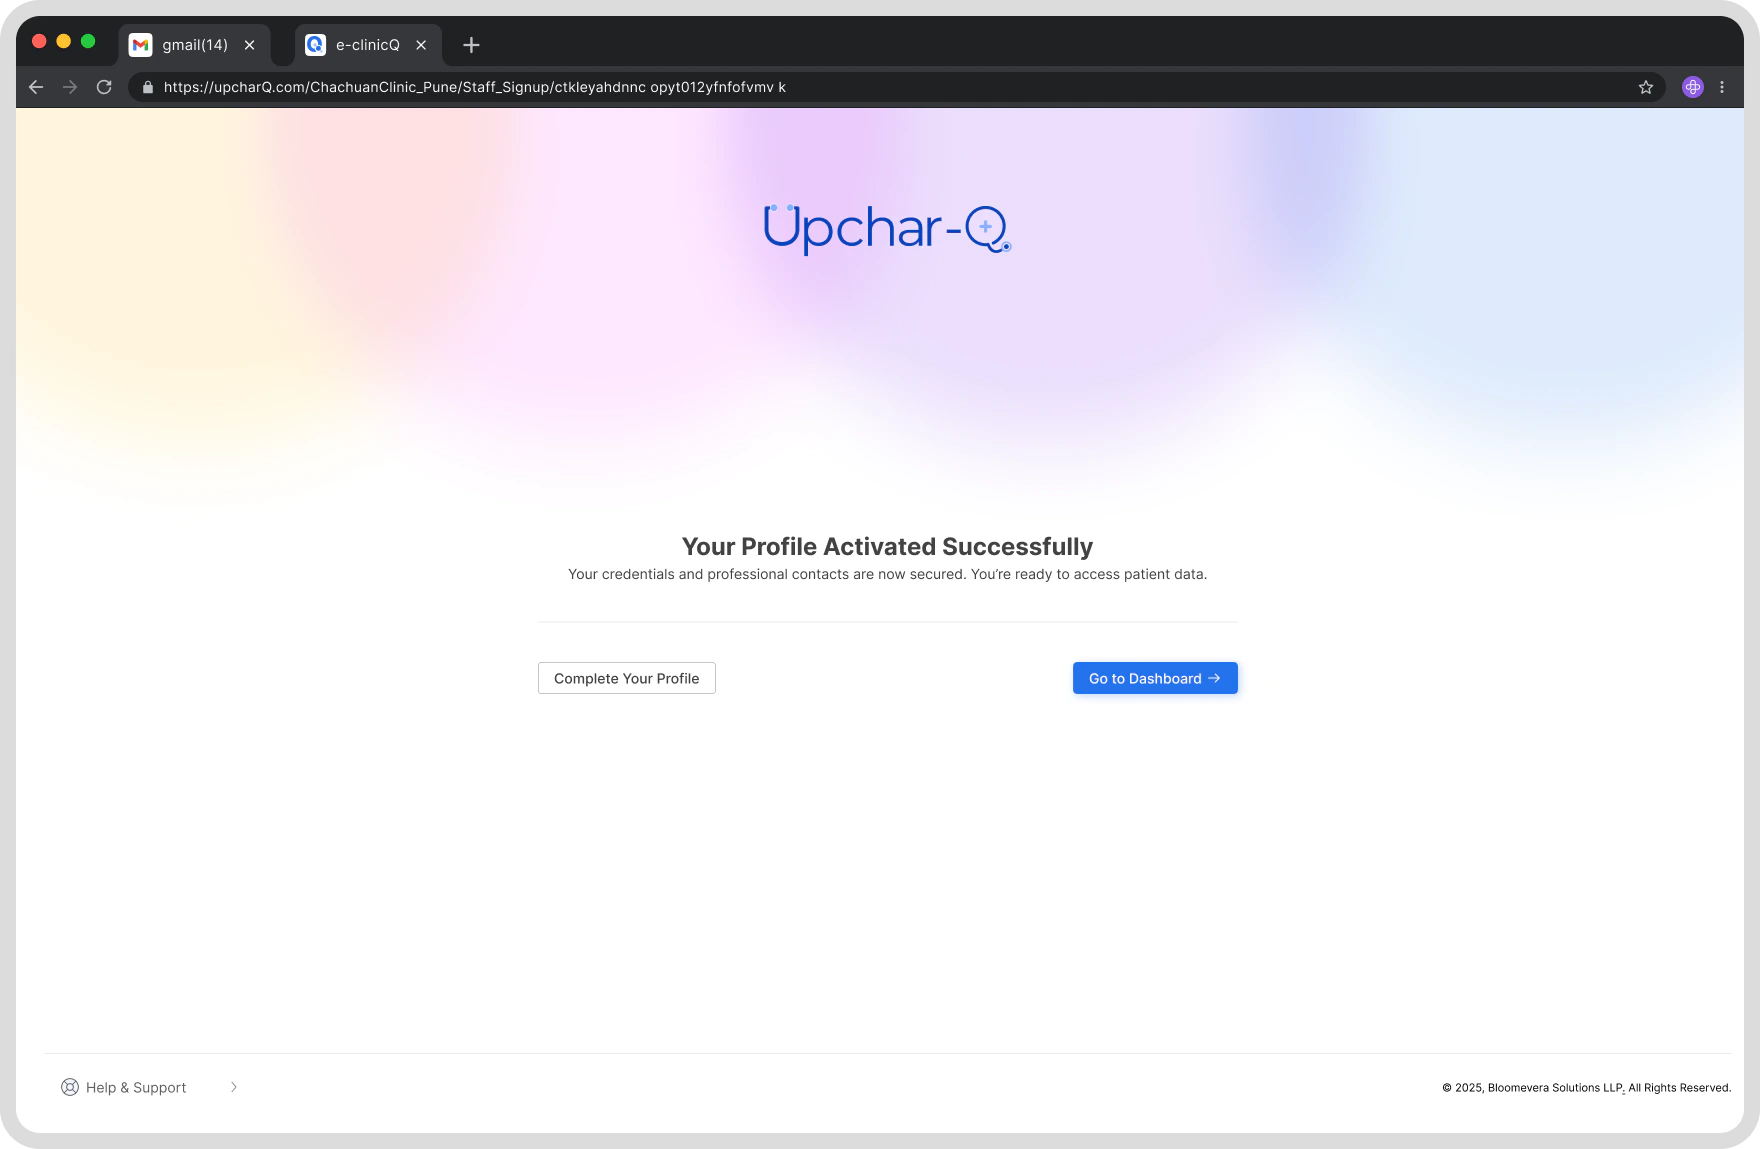
 ## Step 5: Account Activation Complete
Once verification and policy acceptance are completed:
* Your account will be activated immediately.
* No additional approval is required.
* You can begin using Upchar-Q right away.
Your staff account is now fully active.
## Step 5: Account Activation Complete
Once verification and policy acceptance are completed:
* Your account will be activated immediately.
* No additional approval is required.
* You can begin using Upchar-Q right away.
Your staff account is now fully active.
 ## Step 6: Access Queue Management
After activation, you will be automatically redirected to the **Queue Management** screen.
Depending on your assigned permissions, you may be able to:
* Add Walk-In Patients
* Manage Patient Queues
* View Appointment Lists
* Call the Next Patient
* Mark Patients as No Show
* Re-Add Patients to the Queue
* Manage Multiple Doctor Queues
* Monitor Queue Status in Real Time
Your available actions will depend on the permissions assigned by your Hospital or Clinic Administrator.
## What Happens Next?
You are now ready to use Upchar-Q to manage daily patient flow and queue operations.
For detailed instructions on queue management, appointment handling, and patient operations, continue to the **Staff User Guide**.
## Need Help?
If you experience any issues during activation:
* Contact your **Hospital Administrator**
* Contact your **Clinic Administrator**
* Contact the **Upchar-Q Support Team**
Please ensure you are using the **registered mobile number and email address** associated with your account.
***
*Thank you for helping deliver a smoother patient experience with Upchar-Q.*
## Step 6: Access Queue Management
After activation, you will be automatically redirected to the **Queue Management** screen.
Depending on your assigned permissions, you may be able to:
* Add Walk-In Patients
* Manage Patient Queues
* View Appointment Lists
* Call the Next Patient
* Mark Patients as No Show
* Re-Add Patients to the Queue
* Manage Multiple Doctor Queues
* Monitor Queue Status in Real Time
Your available actions will depend on the permissions assigned by your Hospital or Clinic Administrator.
## What Happens Next?
You are now ready to use Upchar-Q to manage daily patient flow and queue operations.
For detailed instructions on queue management, appointment handling, and patient operations, continue to the **Staff User Guide**.
## Need Help?
If you experience any issues during activation:
* Contact your **Hospital Administrator**
* Contact your **Clinic Administrator**
* Contact the **Upchar-Q Support Team**
Please ensure you are using the **registered mobile number and email address** associated with your account.
***
*Thank you for helping deliver a smoother patient experience with Upchar-Q.*